Archive

Articles taggués ‘linux’

BASH : Suppression des accents, cédilles, etc

17/12/2023 Comments off

Comment supprimer les accents, cédilles, etc, dans une chaine de caractères ?

Méthode classique : la substitution

La suppression des caractères accentués et autres cédilles peut être effectuée, en Bash, en utilisant « sed » ou « tr » :

fhh@aaricia ~ $ _str="Une chaine avec des é, des Ù, des À, des ç et des œ"
fhh@aaricia ~ $ echo $_str | sed 'y/áàâäçéèêëîïìôöóùúüñÂÀÄÇÉÈÊËÎÏÔÖÙÜÑ/aaaaceeeeiiiooouuunAAACEEEEIIOOUUN/' Une chaine avec des e, des U, des A, des c et des œ

La méthode est fonctionnelle mais sous entend que tous les caractères à substituer aient été définis. Dans l’exemple, le « œ » n’a pas été remplacé car aucun caractère de remplacement ne lui est alloué.

Autre problème de cette méthode, remplacer une lettre par deux autres tel que « œ » par « oe » ou le « ß » allemand par « ss » nécessite la définition de règles particulières à chaque cas.

Ce sont ces raisons qui nous poussent à éviter cette méthode au profit de la conversion de chaines de caractères.

Méthode recommandée : la conversion

Plus complète, la méthode de conversion présente en sus l’avantage d’être plus concise.

« iconv » est utilisé pour « convertir » la chaine de caractères du format de base, UTF-8 dans l’exemple (option « -f » pour « from »), vers le format ASCII (option « -t » pour « to »).

Avec l’option « TRANSLIT », si un caractère ne peut être transcrit dans le format de destination, il est converti en une chaine de caractère équivalente.

fhh@aaricia ~ $ _str="Une chaine avec des é, des Ù, des À, des çÇ et des œ"
fhh@aaricia ~ $ echo $_str | iconv -f utf8 -t ascii//TRANSLIT Une chaine avec des e, des U, des A, des cC et des oe

La méthode fonctionne sur un large panel de caractères :

fhh@aaricia ~ $ echo "\"ß\"" | iconv -f utf8 -t ascii//TRANSLIT "ss"
fhh@aaricia ~ $ echo "āáǎàēéěèīíǐìōóǒòūúǔùǖǘǚǜĀÁǍÀĒÉĚÈĪÍǏÌŌÓǑÒŪÚǓÙǕǗǙǛ" | iconv -f utf8 -t ascii//TRANSLIT aaaaeeeeiiiioooouuuuuuuuAAAAEEEEIIIIOOOOUUUUUUUU

et peut être utilisée sur des fichiers :

fhh@aaricia ~ $ cat myfile.txt Une chaine avec des é, des Ù, des À, des ç et des œ   et même des "ß"
fhh@aaricia ~ $ iconv -f utf8 -t ascii//TRANSLIT < myfile.txt > noaccents.txt
fhh@aaricia ~ $ cat noaccents.txt Une chaine avec des e, des U, des A, des c et des oe   et meme des "ss"
 
Categories: Système Tags: , , ,

Scripts shell de sauvegarde

15/12/2023 Comments off

Une des façons les plus simples de sauvegarder un système utilise un script shell. Par exemple, un script peut être utilisé pour configurer les répertoires à sauvegarder et transmettre ces répertoires comme arguments à l’utilitaire tar, ce qui crée un fichier d’archive. Le fichier d’archive peut ensuite être déplacé ou copié dans un autre emplacement. L’archive peut également être créée sur un système de fichiers distant tel qu’un montage NFS.

L’utilitaire tar crée un fichier d’archive de plusieurs fichiers ou répertoires. tar peut également filtrer les fichiers par le biais des utilitaires de compression, réduisant ainsi la taille du fichier d’archive.

Categories: Système Tags: , , ,

Learn Bash: Remove Commands From Your History

15/12/2023 Comments off

Occasionally I type a password or other sensitive information into a shell prompt. Using bash history, the command can be removed.

# say we start with an empty bash command history
bash-3.2$ history
 1 history
# enter a command that requires a password
bash-3.2$ sudo rm -i some_file
Password:
# accidentally ^C and type your password
# into the prompt and hit enter
bash-3.2$ secret_password
bash: secret_password: command not found
# your password is now there for all to
# see in your bash history
bash-3.2$ history
 1 history
 2 sudo rm -i some_file
 3 secret_password
 4 history
# first option to fix it, delete the numbered entry from
# history and write to your ~/.bash_history file
bash-3.2$ history -d 3
bash-3.2$ history -w
# entry 3 will be removed entirely from your command history
bash-3.2$ history
 1 history
 2 sudo rm -i some_file
 3 history
 4 history -d 3
 5 history -w
 6 history
# the second option is to clear the entire history
# and write the changes to disk
bash-3.2$ history -c
bash-3.2$ history -w
# it's now pretty obvious that your history has been
# scrubbed clean, but at least your password is history!
bash-3.2$ history
 1 history -w
 2 history
Categories: Système Tags: , , ,

The role of shells in the Linux environment

10/12/2023 Comments off

Shell is used for various purposes under Linux. Linux user environment is made of the following components:

  • Kernel – The core of Linux operating system.
  • Shell – Provides an interface between the user and the kernel.
  • Terminal emulator – The xterm program is a terminal emulator for the X Window System. It allows user to enter commands and display back their results on screen. 
  • Linux Desktop and Windows Manager – Linux desktop is collection of various software apps. It includes the file manger, the windows manager, the Terminal emulator and much more. KDE and Gnome are two examples of the complete desktop environment in Linux.

Login

User can login locally into the console when in runlevel # 3 or graphically when in runlevel # 5 (the level numbers may differ depending on the distribution). In both cases you need to provide username and password. Bash uses the following initialization and start-up files:

  1. /etc/profile – The systemwide initialization file, executed for login shells.
  2. /etc/bash.bashrc – The systemwide per-interactive-shell startup file. This is a non-standard file which may not exist on your distribution. Even if it exists, it will not be sourced unless it is done explicitly in another start-up file.
  3. /etc/bash.logout – The systemwide login shell cleanup file, executed when a login shell exits.
  4. $HOME/.bash_profile – The personal initialization file, executed for login shells.
  5. $HOME/.bashrc – The individual per-interactive-shell startup file.
  6. $HOME/.bash_logout – The individual login shell cleanup file, executed when a login shell exits.
  7. $HOME/.inputrc – Individual readline initialization file.

Bash Startup Scripts

Script of commands executed at login to set up environment. For example, setup JAVA_HOME path.

Login Shell

Login shells are first shell started when you log in to the system. Login shells set environment which is exported to non-login shells. Login shell calls the following when a user logs in:

Non-Login Shell

Bash Logout Scripts

  • When a login shell exits, bash reads and executes commands from the file $HOME/.bash_logout, if it exists.

Source: Cybercitiz

Categories: Système Tags: , ,

How to Enable IP Forwarding in Linux

07/12/2023 Comments off

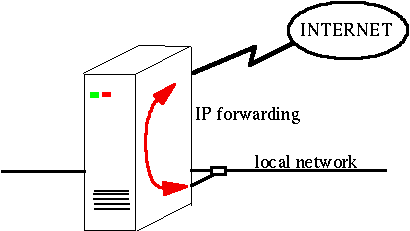
ip forwarding linuxBy default any modern Linux distributions will have IP Forwarding disabled. This is normally a good idea, as most peoples will not need IP Forwarding, but if we are setting up a Linux router/gateway or maybe a VPN server (pptp or ipsec) or just a plain dial-in server then we will need to enable forwarding. This can be done in several ways that I will present bellow.

Check if IP Forwarding is enabled

We have to query the sysctl kernel value net.ipv4.ip_forward to see if forwarding is enabled or not: Using sysctl:

sysctl net.ipv4.ip_forward
net.ipv4.ip_forward = 0

or just checking out the value in the /proc system:

cat /proc/sys/net/ipv4/ip_forward
0

As we can see in both the above examples this was disabled (as show by the value 0).

Enable IP Forwarding on the fly

As with any sysctl kernel parameters we can change the value of net.ipv4.ip_forward on the fly (without rebooting the system):

sysctl -w net.ipv4.ip_forward=1

or

echo 1 > /proc/sys/net/ipv4/ip_forward

the setting is changed instantly; the result will not be preserved after rebooting the system.

Permanent setting using /etc/sysctl.conf

If we want to make this configuration permanent the best way to do it is using the file /etc/sysctl.conf where we can add a line containing net.ipv4.ip_forward = 1

/etc/sysctl.conf:
net.ipv4.ip_forward = 1

if you already have an entry net.ipv4.ip_forward with the value 0 you can change that 1.

To enable the changes made in sysctl.conf you will need to run the command:

sysctl -p /etc/sysctl.conf

On RedHat based systems this is also enabled when restarting the network service:

service network restart

and on Debian/Ubuntu systems this can be also done restarting the procps service:

/etc/init.d/procps.sh restart

Using distribution specific init scripts

Although the methods presented above should work just fine and you would not need any other method of doing this, I just wanted to note that there are also other methods to enable IP Forwarding specific to some Linux distributions. For example Debian based distributions might use the setting:

/etc/network/options:
ip_forward=no

set it to yes and restart the network service. Also RedHat distributions might set this using:

/etc/sysconfig/network:
FORWARD_IPV4=true

and again restart the network service.

Regardless the method you have used once you have completed this you can check it out using the same method shown above:

sysctl net.ipv4.ip_forward
net.ipv4.ip_forward = 1


cat /proc/sys/net/ipv4/ip_forward
1

If the result is 1 then the Linux system will start forwarding IP packets even if they are not destined to any of its own network interfaces.

Categories: Réseau Tags: