Archive

Articles taggués ‘backup’

Simple versioned TimeMachine-like backup using rsync

25/06/2024 Comments off

time machine rsyncUsing TimeMachine with rsync: Over many years, I have dealt with scripts that do backup versioning, i.e., maintain multiple backups. Due to their flexibility, they have been complex to understand and configure. Here is a simple rsync-based tool with a different focus: The experienced systems administrator who wants to keep his system’s complexity down.

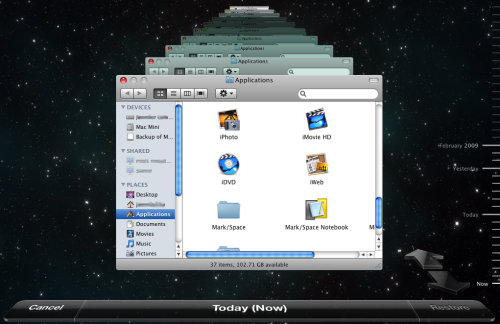
Backup in action: TimeMachine and rsync

It consists of a simple script, which you can call rsync-backup.sh and store wherever you like, e.g., in /usr/local/sbin. I will use these names and paths in the examples.

#!/bin/sh
# Usage: rsync-backup.sh <src> <dst> <label>
if [ "$#" -ne 3 ]; then
    echo "$0: Expected 3 arguments, received $#: $@" >&2
    exit 1
fi
if [ -d "$2/__prev/" ]; then
    rsync -a --delete --link-dest="$2/__prev/" "$1" "$2/$3"
else
    rsync -a                                   "$1" "$2/$3"
fi
rm -f "$2/__prev"
ln -s "$3" "$2/__prev"

During normal operation, it boils down to three simple statements:

  1. rsync with --link-dest: Copying the contents of <src> to <dst>/<label>, reusing the files from the previous backup with hard links ((The non---link-dest rsync does not use --delete to reduce the risk of accidentally deleting files when called with wrong parameters))
  2. rm and ln: Remember this backup location for the next incremental backup.

Voilà – it doesn’t get much easier than that!

Of course, there is something missing: The actual backup policy. It is separated into cron, which I consider an advantage. Using this separation of duties, many policies can be implemented very easily and composed in a modular way:

Create daily backups  for every weekday

You might know this from automysqlbackup or autopostgresqlbackup: A backup is created every day and overwritten after 7 days. This is achieved by adding the following file to /etc/cron.daily/:

#!/bin/sh
/usr/local/bin/rsync-backup.sh /home /data/backup `date +%A`

All your user’s files are copied daily to /data/backup, named after the current day, overwritten weekly.

Daily backups for a month

Sure, this is easy as well, by putting this with a descriptive name into/etc/cron.daily/:

#!/bin/sh
/usr/local/bin/rsync-backup.sh /home /data/backup `date +Day-%d`
Lire la suite…

Categories: Système Tags: , , , ,

HowTo: Make Ubuntu a Perfect Mac File Server and Time Machine Volume

06/06/2024 Comments off

ubuntu time machineFor quite some time I use my Ubuntu machine as a file and backup server for all Macs in my network which is perfectly accessible from the Finder in Mac OS X. There are some instructions available in the web for this task but all failed in my case so I wrote my own tutorial with all the steps needed for it to work properly.

So here’s my little Tutorial for connecting Mac OS X Leopard with Ubuntu and using your Ubuntu machine as a backup volume for Time Machine but all steps can be reproduced on every Linux box and they work with Mac OS X 10.4 Tiger too. At the end of this tutorial you will have a server which shows up in the Finder sidebar and behaves just like a Mac server when accessing it from your Macs. To be perfectly integrated with Mac OS X we’re going to use Apple’s Filing Protocol (AFP) for network and file sharing.

Although this Tutorial involves using the Terminal in Ubuntu and looks a bit geeky it’s very easy even for beginners. I have tried to explain all steps and Terminal commands so you may learn a bit about the Terminal too. At the end of the article you can download my Server Displays icon pack quickly made by me with custom icons for a Mac, Ubuntu and Windows server.

Personally I use a fresh installation of Ubuntu 8.04 Hardy Heron Desktop version (32bit on one machine, 64bit on the other) and Mac OS X Leopard (10.5.3 and later) to connect to them. On my Ubuntu boxes there’s no other file sharing protocol like samba (Windows sharing) or NFS activated.

Rumors are Apple will add some undocumented AFP commands with the Mac OS X 10.5.6 update which therefor won’t be supported by the current Netatalk package (and maybe never will). So be sure to check the latest comments on this article when the 10.5.6 update is out to see if this rumor is true and if there are problems caused by that.

Here are the steps involved in setting up your Ubuntu box as a Mac file server:

  1. Modify and install Netatalk (Open Source AFP implementation)
  2. Configure Netatalk
  3. Configure shared volumes (and Time Machine volume)
  4. Install Avahi (Open Source Bonjour implementation)
  5. Configure Avahi and advertise services
  6. Configure TimeMachine
  7. Conclusion, Problems and more informations
  8. Downloading and using the Server Display Icons
  9. Translations Of This Article

Lire la suite…

Categories: Système Tags: , , ,

Websync, web interface to manage your rsync tasks

20/04/2024 Comments off

Source: freedif.org

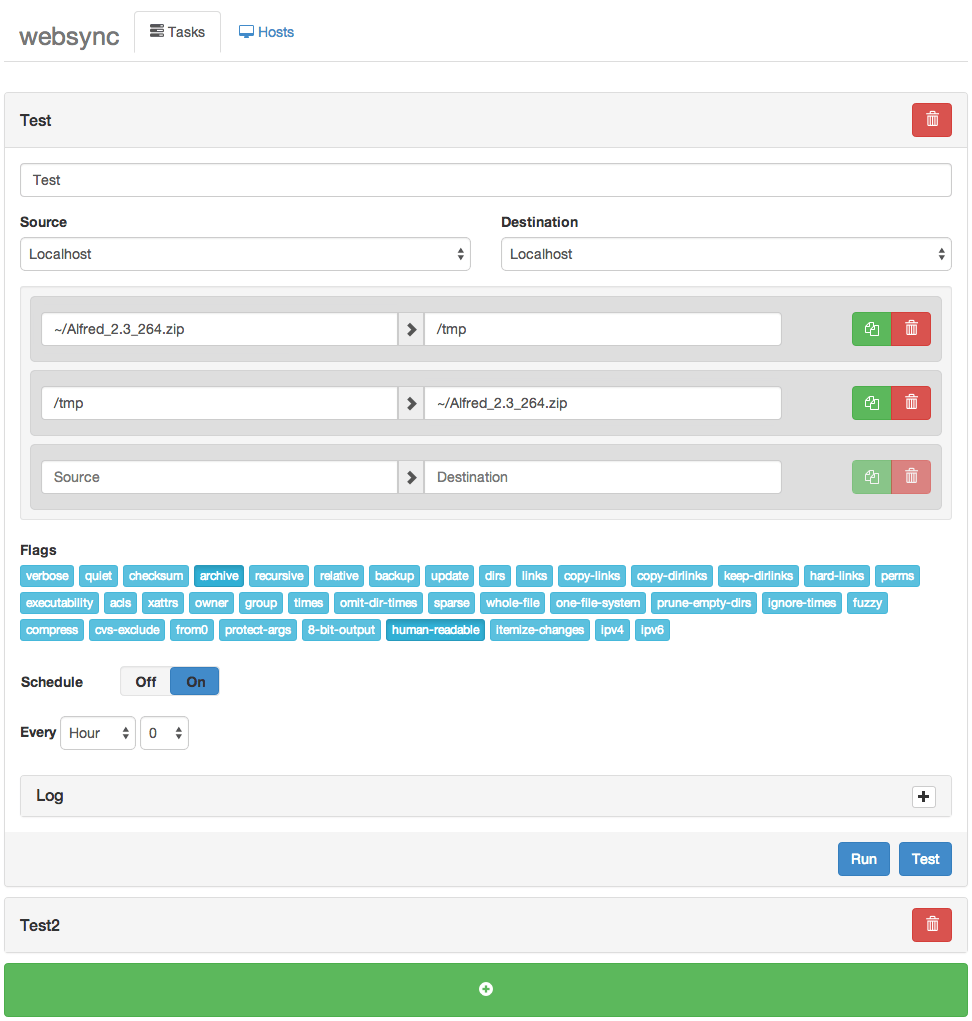
tasks_tabRsync is a great tool to replicate, sync some data on your computer. And I’m heavily relying on it to backup my server and to mirror some opensource projects and GNU/Linux Distributions.

But I’ve recently found a Web interface to manage all my rsync tasks called websync.

Websync is a web based rsync task manager where you can add, edit, clone, remove, scheduled,…. your rsync tasks while being able to have a remote host as source or destination of the task (With SSH RSA key too)

Under the free license MIT, Websync has been developped by Sander Struijk and is still actively being maintained, as you can see on github forum. But it is still an early project, so if you face any issue, make sure to report them on the issue tracker.

Interested to give it a shot, here is how to install Websync!

Lire la suite…

Categories: Logiciel, Système Tags: , , ,

How to Backup Linux? 15 rsync Command Examples

20/04/2024 Comments off

Source: TheGeekStuff

rsync-commandrsync stands for Remote SYNC.

rsync is used to perform the backup operation in UNIX / Linux.

rsync utility is used to synchronize the files and directories from one location to another in an effective way. Backup location could be on local server or on remote server.

Important features of rsync

  • Speed: First time, rsync replicates the whole content between the source and destination directories. Next time, rsync transfers only the changed blocks or bytes to the destination location, which makes the transfer really fast.
  • Security: rsync allows encryption of data using ssh protocol during transfer.
  • Less Bandwidth: rsync uses compression and decompression of data block by block at the sending and receiving end respectively. So the bandwidth used by rsync will be always less compared to other file transfer protocols.
  • Privileges: No special privileges are required to install and execute rsync

Syntax

$ rsync options source destination

Source and destination could be either local or remote. In case of remote, specify the login name, remote server name and location.
Lire la suite…

Categories: Système Tags: , , , ,

Configuration d’un serveur dédié de A à Z

17/03/2024 Comments off

Installation, configuration et administration d’un serveur dédié

debianCes tutoriaux ont été réalisés sous Debian (versions Etch 4.0 et Lenny 5.0) mais peuvent être transposés à d’autres distributions Linux, notamment Ubuntu. Ils sont applicables aux serveurs dédiés 1&1, Dedibox, OVH, Amen, et bien d’autres.

warning Tous les tutoriaux sont basés sur un serveur nommé test.alsacreations.com pour lequel nous disposons d’un utilisateur dew et d’un accès root (super-administrateur), chacun avec leur propre mot de passe.

Nous partons de l’idée d’obtenir un serveur web avec tout ce qu’il faut pour héberger plusieurs domaines et sites. Vous pouvez tout configurer à la main ou bien faire confiance à un panel d’administration.

Liste complète sans panel web

idee Ces tutoriaux conviennent à l’installation complète d’un serveur

  1. Première connexion : SSH, accès root et bases
  2. Apache et PHP : le serveur web
  3. MySQL : les bases de données
  4. Proftpd : le serveur FTP
  5. Postfix : le serveur mail POP3 et SMTP
  6. Sauvegarde automatique : avec backup-manager et export FTP
  7. Sécurisation : les règles de base, un firewall avec iptables, fail2ban…
  8. Bind : exécuter le serveur DNS en chroot
  9. Monitoring : garder un oeil sur son serveur grâce à monit et logwatch
  10. Roundcube : un webmail léger et rapide

Liste complète avec panel d’administration DTC

dtclogo

idee Si vous choisissez d’installer le panel d’administration DTC, suivez ces tutoriels. DTC se chargera de la configuration du reste des services.

  1. Première connexion : SSH, accès root et bases
  2. Bind : exécuter le serveur DNS en chroot
  3. Sécurisation : les règles de base, un firewall avec iptables, fail2ban…
  4. Panel DTC : pour installer et gérer les services web, ftp, mysql, e-mail, dns…
  5. Monitoring : garder un oeil sur son serveur grâce à monit et logwatch
  6. Sauvegarde automatique : backup-manager et export FTP
  7. Roundcube : un webmail léger et rapide

Attention : nous préconisons désormais l’utilisation du panel ISPConfig, en lieu et place du panel DTC. Il est tout aussi simple à installer et à utiliser. Veuillez vous référer à sa documentation.