How can I use dd command on a Linux to test I/O performance of my hard disk drive? How do I check the performance of a hard drive including the read and write speed on a Linux operating systems?
You can use the following commands on a Linux or Unix-like systems for simple I/O performance test:
dd command : It is used to monitor the writing performance of a disk device on a Linux and Unix-like system.
hdparm command : It is used to get/set hard disk parameters including test the reading and caching performance of a disk device on a Linux based system.
In this tutorial you will learn how to use the dd command to test disk I/O performance.
Use dd command to monitor the reading and writing performance of a disk device:
Open a shell prompt.
Or login to a remote server via ssh.
Use the dd command to measure server throughput (write speed)
Try the following connection options in iSpy to connect to your Hikvision IP camera. If VLC or FFMPEG options are available we recommend you try those first as they will often be faster and include audio support. If you don’t have VLC installed (or are experiencing problems with the VLC plugin) you may be able to use the same URL under the FFMPEG source type (VLC is based on FFMPEG).
The settings for Hikvision cameras are built into our open source project ispy – click « Add » then « IP camera with wizard » to automatically setup your Hikvision cameras. If the camera is not listed in iSpy then click « Get Latest List » when on the add camera wizard. If you need to modify the URL then add or edit the Hikvision camera in iSpy and you can modify the connection type and URL in the video source dialog (button is top of the first tab). Lire la suite…
Recently I discovered the pi’s in my quest for making a device with recognition software to locate items on the ground while being attached to a multi-rotor helicopter.
The Raspberry Pi is perfect. only needing 5v to run means its great for running off batteries etc. anyway to the streaming part.
To stream to VLC from your Raspberry Pi Camera to your computer over a network you need to install VLC Player on both the Raspberry Pi & PC/ Mac what ever.
for the PC/ MAC its simple just go to the VLC downloads page – http://www.videolan.org/ as for the Pi its more complicated. Lire la suite…
Si vous êtes sous Mac et que vous tentez de faire un
sudo port selfupdate
pour mettre à jour MacPorts, il est possible que vous obteniez le message suivant :
Error: /opt/local/bin/port: port selfupdate failed: Error installing new MacPorts base: command execution failed
Pas de panique !
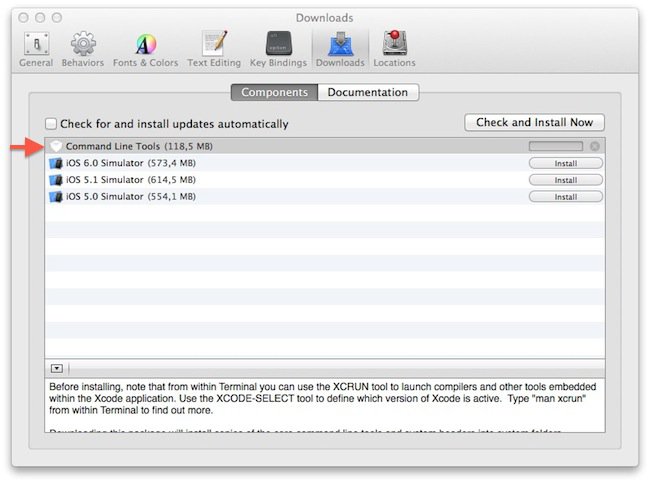
Pour arranger le souci, il suffit que vous installiez Xcode et les Command Line Tools. Pour cela, rendez-vous dans l’App Store. Installez Xcode, puis lancez-le.
Ensuite, allez dans le menu XCode -> Preferences et dans l’onglet « Downloads », installez les « Command Line Tools ».
Relancez ensuite la commande
sudo port selfupdate
Et cette fois, Mac Ports devrait se mettre à jour correctement. Ensuite, pour mettre à jour les paquets dont la date limite de fraicheur a expiré, tapez la commande :
Si vous êtes utilisateur d’OSX, peut-être faites-vous vos sauvegardes avec Time Machine sur un NAS ou une Time Capsule…
Et ça vous fait ch*er car cette sauvegarde se lance une fois par heure, faisant ramer votre ordinateur déjà un peu à bout de souffle… C’est quand même un peu sauvage un backup incrémental toutes les heures, surtout quand on passe sa vie sur The Pirate Bay 🙂
Alors, comment faire pour programmer cette sauvegarde une fois par jour (genre la nuit) ou une fois par semaine, voire une fois par mois si vraiment les sauvegarde vous n’en avez rien à faire (et ça c’est mal !) ?
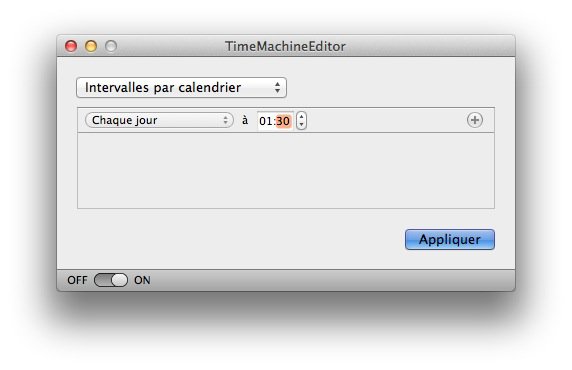
La solution s’appelle Time Machine Editor. Il s’agit d’un petit soft pour OSX qui permet tout simplement de programmer le moment exact où vous souhaitez lancer la sauvegarde TimeMachine.
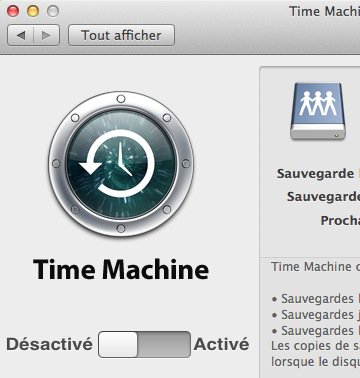
Attention, ce soft nécessite pour fonctionner efficacement, que vous désactiviez la TimeMachine. (oui, ça peut paraitre bizarre, mais Time Machine Editor gère son truc de son côté.)
Edit: l’ami Daniel me recommande aussi TimeMachineScheduler qui fait sensiblement la même chose. Ce dernier ne nécessite pas de devoir désactiver la Time Machine et s’intègre dans les préférences système de l’OS.