Archive

Articles taggués ‘MySQL’

How To Install and Secure phpMyAdmin on Ubuntu 16.04

28/12/2023 Comments off

Introduction

While many users need the functionality of a database management system like MySQL, they may not feel comfortable interacting with the system solely from the MySQL prompt.

phpMyAdmin was created so that users can interact with MySQL through a web interface. In this guide, we’ll discuss how to install and secure phpMyAdmin so that you can safely use it to manage your databases from an Ubuntu 16.04 system. 

Prerequisites

Before you get started with this guide, you need to have some basic steps completed.

First, we’ll assume that you are using a non-root user with sudo privileges, as described in steps 1-4 in the initial server setup of Ubuntu 16.04.

We’re also going to assume that you’ve completed a LAMP (Linux, Apache, MySQL, and PHP) installation on your Ubuntu 16.04 server. If this is not completed yet, you can follow this guide on installing a LAMP stack on Ubuntu 16.04.

Finally, there are important security considerations when using software like phpMyAdmin, since it:

  • Communicates directly with your MySQL installation
  • Handles authentication using MySQL credentials
  • Executes and returns results for arbitrary SQL queries

For these reasons, and because it is a widely-deployed PHP application which is frequently targeted for attack, you should never run phpMyAdmin on remote systems over a plain HTTP connection. If you do not have an existing domain configured with an SSL/TLS certificate, you can follow this guide on securing Apache with Let’s Encrypt on Ubuntu 16.04.

Once you are finished with these steps, you’re ready to get started with this guide.
Lire la suite…

Categories: Bases de données Tags: , ,

How To Measure MySQL Query Performance with mysqlslap

28/12/2023 Comments off

Source: digitalocean

Introduction

MySQL comes with a handy little diagnostic tool called mysqlslap that’s been around since version 5.1.4. It’s a benchmarking tool that can help DBAs and developers load test their database servers.

mysqlslap can emulate a large number of client connections hitting the database server at the same time. The load testing parameters are fully configurable and the results from different test runs can be used to fine-tune database design or hardware resources.

In this tutorial we will learn how to use mysqlslap to load test a MySQL database with some basic queries and see how benchmarking can help us fine-tune those queries. After some basic demonstrations, we will run through a fairly realistic test scenario where we create a copy of an existing database for testing, glean queries from a log, and run the test from a script.

The commands, packages, and files shown in this tutorial were tested on CentOS 7. The concepts remain the same for other distributions. Lire la suite…

How do I… Stress test MySQL with mysqlslap?

27/12/2023 Comments off

One of the interesting new tools in MySQL 5.1.4 is mysqlslap, a load emulator that lets you see how well a particular query set or table engine performs under high-load conditions.

A query that consumes too many database resources may be the result of designing tables incorrectly, choosing the wrong table type, or creating an inefficient query. When a query eats up a lot of database resources, it can negatively affect other application components. By using mysqlslap to stress test a server in a non-public environment, you will discover these errors sooner, allowing you to you avoid a database meltdown once your application goes live.

This tutorial shows how you can use mysqlslap to run stress tests involving multiple clients, custom queries, different table engines, and much more. Lire la suite…

Dumper une base MySQL avec horodatage dans le nom du fichier

14/12/2023 Comments off

J’ai un projet qui utilise la base de données MySQL. Je souhaite sauvegarder la base de données tous les jours, donc j’utilise ceci:

mysqldump -h host -u user -p database de mots de passe> 'location.sql'

Je souhaite que les fichiers soient nommés avec l’horodatage, c’est-à-dire:

Aujourd’hui, le fichier sera nommé quelque chose-07-05-2014 08-00-00
Demain sera quelque chose-08-05-2014 08-00-00

Comment ajouter un timestamp formaté avec le nom de fichier exporté?

Réponse:

Une solution serait:

mysqldump -h host -u user -p password database > quelque chose-$(date +%d-%m-%Y %H %M %S).sql

Pour un horodatée qui permette le tri correct des fichiers, il fait changer l’ordre des paramètres et utiliser:

%Y-%m-%d

de manière à trier sur année, mois puis jour. Ne rien changer pour les hh:mm:ss puisque le tri se fair naturellement dans cas.

Pour automatiser ce dump, il faut insérer cette commande dans le crontab (du root ou de l’utilisateur):

0 */8 * * * root /usr/bin/mysqldump -h host -u user -p password database > quelque chose-$(date +%d-%m-%Y %H %M %S).sql

pour que la commande s’exécute toutes les 3 heures (24h ÷ 8).

Categories: Système Tags: , , ,

Réplication MySql Croisée

13/12/2023 Comments off

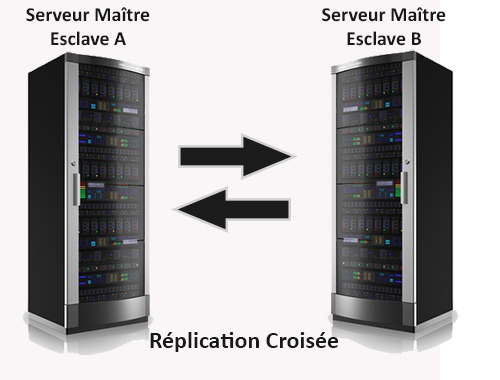
I► Nous allons voir dans cet article comment mettre en place une réplication croisée MySql en optimisant donc la répartition des charges et la sécurisation des données.

Pour des raisons de simplicité, nous testerons cette config sur le même serveur en utilisant mysqld_multi ( référez vous aux précédents articles )

Ordi2


Voici le fichier de conf de MySql

[root@/etc/mysql] cat multi_my.cnf.replicant.double
[mysqld_multi]
mysqld = /usr/bin/mysqld_safe
mysqladmin = /usr/bin/mysqladmin
user = root
password = debian

#——————– Serveur A ——————

[mysqld1]
socket = /tmp/mysql.sock1
port = 3307
pid-file = /var/lib/mysql1/hostname.pid1
datadir = /var/lib/mysql1
language = /usr/share/mysql/french
user = mysql

server-id=1
log-bin = /var/log/mysql/mysql_master_bin.log
binlog_do_db=centrale
replicate-do-db=centrale

master-host = 127.0.0.1
master-port = 3308
master-user = replicant
master-password = replicator

relay-log = /var/lib/mysql/slave-relay.log
relay-log-index = /var/lib/mysql/slave-relay-log.index

auto_increment_increment = 10
auto_increment_offset = 1

#————–Serveur B ———————-

[mysqld2]
socket = /tmp/mysql.sock2
port = 3308
pid-file = /var/lib/mysql2/hostname.pid2
datadir = /var/lib/mysql2
language = /usr/share/mysql/french
user = mysql
server-id=2
log-bin = /var/log/mysql/mysql_master_bin.log
binlog_do_db=centrale
replicate-do-db=centrale
master-host = 127.0.0.1
master-port = 3307
master-user = replicant
master-password = replicator
master-connect-retry=60
relay-log = /var/lib/mysql/slave-relay.log
relay-log-index = /var/lib/mysql/slave-relay-log.index

auto_increment_increment = 10
auto_increment_offset = 2

Important :

Les fichiers de logs doivent être les mêmes et l’utilisateur de réplication doit bien sûr être créé sur les 2 serveurs maîtres.