When you are using Linux command line frequently, using the history effectively can be a major productivity boost. In fact, once you have mastered the 15 examples that I’ve provided here, you’ll find using command line more enjoyable and fun.
1. Display timestamp using HISTTIMEFORMAT
Typically when you type history from command line, it displays the command# and the command. For auditing purpose, it may be beneficial to display the timepstamp along with the command as shown below.
# export HISTTIMEFORMAT='%F %T '
# history | more
1 2008-08-05 19:02:39 service network restart
2 2008-08-05 19:02:39 exit
3 2008-08-05 19:02:39 id
4 2008-08-05 19:02:39 cat /etc/redhat-release
2. Search the history using Control+R
Lire la suite…
To get a list of packages installed locally do this in your terminal:
dpkg --get-selections | grep -v deinstall
To save that list to a text file called packages on your desktop do this in your terminal:
dpkg --get-selections | grep -v deinstall > ~/Desktop/packages
Source: myunster.com
In order to update « locate » database on OS X, some people suggest create a symlink:
sudo ln -s /usr/libexec/locate.updatedb /usr/local/bin/updatedb
However, this method can create an erroneous output if you are in directory with specific permission e.g.
shell-init: error retrieving current directory: getcwd: cannot access parent directories: Permission denied
shell-init: error retrieving current directory: getcwd: cannot access parent directories: Permission denied
shell-init: error retrieving current directory: getcwd: cannot access parent directories: Permission denied
find: .: Permission denied
The better method would be create a bash script /usr/bin/updatedb:
  #!/bin/bash
  pushd . > /dev/null
  cd /usr/libexec
  echo "Updating locate database..."
  sudo ./locate.updatedb
  echo "Updating complete!"
  popd > /dev/null
Make it executable: sudo chmod +x /usr/bin/updatedb
Now you can just run «sudo updatedb», in order to update «locate» database.
 Need to monitor Linux server performance? Try these built-in command and a few add-on tools. Most Linux distributions are equipped with tons of monitoring. These tools provide metrics which can be used to get information about system activities. You can use these tools to find the possible causes of a performance problem. The commands discussed below are some of the most basic commands when it comes to system analysis and debugging server issues such as:
- Finding out bottlenecks.
- Disk (storage) bottlenecks.
- CPU and memory bottlenecks.
- Network bottlenecks.
#1: top – Process Activity Command
The top program provides a dynamic real-time view of a running system i.e. actual process activity. By default, it displays the most CPU-intensive tasks running on the server and updates the list every five seconds.
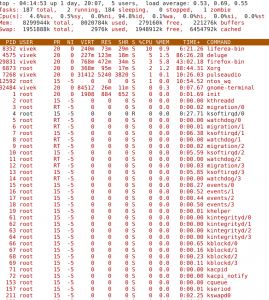 Commonly Used Hot Keys
The top command provides several useful hot keys:
| Hot Key |
Usage |
| t |
Displays summary information off and on. |
| m |
Displays memory information off and on. |
| A |
Sorts the display by top consumers of various system resources. Useful for quick identification of performance-hungry tasks on a system. |
| f |
Enters an interactive configuration screen for top. Helpful for setting up top for a specific task. |
| o |
Enables you to interactively select the ordering within top. |
| r |
Issues renice command. |
| k |
Issues kill command. |
| z |
Turn on or off color/mono |
Source: Linux Addicted
Use Command Check Process:
#top
or
#ps aux
or
#ps -el
or
#ps aux | awk '{ print $8 " " $2 }' | grep -w Z
or
#ps -elf | grep Z
or
#ps -ef | grep firefox
Output:
Z 6502
Z 8320
Z 6985
Use Command kill zombie Process:
# kill -9 6985