Archive

Articles taggués ‘Apple’

How to make a bootable OS X 10.10 Yosemite install drive

28/04/2021 Comments off

Source: Macworld

Back in the day when we bought OS X on discs, as long as you kept that disc, you always had a bootable installer just in case. Modern, downloadable versions of OS X create a recovery partition on your drive, but it’s always a smart idea to make your own bootable installer drive too.

I recommend making one for Yosemite, on an external hard drive or USB thumb drive, for many of the same reasons I recommend making a bootable Mavericks installer drive: If you want to install Yosemite on multiple Macs, using a bootable installer drive can be more convenient than downloading or copying the entire installer to each computer. If you want to erase the drive on a Mac before installing Yosemite, or start over at any time, you can use a dedicated installer drive to boot that Mac, erase its drive, and then install the OS clean and restore whatever data you need from a backup. And if your Mac is experiencing problems, a bootable installer drive makes a handy emergency disk.

Macworld also has bootable-install-drive instructions for Mavericks (OS X 10.9), Mountain Lion (OS X 10.8), and Lion (OS X 10.7).

As with previous versions of OS X, it’s not difficult to create a bootable installer drive from the Yosemite installer, though the processes have changed slightly since Mavericks. I show you how, below. Lire la suite…

Categories: Système, Tutoriel Tags: ,

How to Disable Webcam / FaceTime Camera on Mac Completely

22/01/2021 Comments off

Source: osxdaily.com

Some of the more privacy conscious Mac users out there might put tape over their webcam or use apps like Oversight to detect camera activity. While either of those approaches can be satisfactory for many users (or considered totally paranoid and overboard to others), many advanced Mac users in the security community go a step further and just outright disable their Macs front-facing web camera. This article will show you how to completely deactivate the front FaceTime camera on a Mac.


To be clear, this aims to completely disable the software components behind the built-in camera on Macs which prevents it from being used by any application, this webcam is sometimes called the FaceTime camera or the iSight camera, or simply the front-facing camera. All modern Macs have this camera, it is located at the top of the display and embedded into the screen bezel. By disabling the Macs camera, any application that requires it’s usage will no longer function as intended because camera access will become impossible. 

This is an advanced tutorial aimed at advanced users, it is not intended for novice or casual Mac users. This approach disables the Mac built-in camera by changing system level permissions for system level files directly relating to the camera components. If you are not comfortable modifying system files using the command line with super user privileges, do not proceed.

This tutorial applies to modern versions of MacOS including Sierra and El Capitan, you will need turn off rootless temporarily so that you can make modifications to the system folder, if you’re not sure how to do that, you can learn how to disable SIP on Mac OS here. You should aways backup a Mac before making any modifications to system software. Older versions of Mac OS X that wish to disable the iSight camera can follow these instructions instead to accomplish the same effect.

How to Disable the Web Camera on Mac

This is a string of commands that will completely disable the built-in Mac camera, meaning no applications will be able to use the front-facing camera at all. This is intended for advanced users only who thoroughly understand proper syntax and command line usage. 

    1. Back up the Mac if you have not done so already, then you will need to disable SIPfirst (and yes you should re-enable it when finished)
    2. Open the Terminal app as found in /Applications/Utilities/
    3. One by one on their own line and executed separately, issue the following five command strings into the command line and authenticate:

    sudo chmod a-r /System/Library/Frameworks/CoreMediaIO.framework/Versions/A/Resources/VDC.plugin/Contents/MacOS/VDC

    sudo chmod a-r /System/Library/PrivateFrameworks/CoreMediaIOServicesPrivate.framework/Versions/A/Resources/AVC.plugin/Contents/MacOS/AVC

    sudo chmod a-r /System/Library/QuickTime/QuickTimeUSBVDCDigitizer.component/Contents/MacOS/QuickTimeUSBVDCDigitizer

    sudo chmod a-r /Library/CoreMediaIO/Plug-Ins/DAL/AppleCamera.plugin/Contents/MacOS/AppleCamera

    sudo chmod a-r /Library/CoreMediaIO/Plug-Ins/FCP-DAL/AppleCamera.plugin/Contents/MacOS/AppleCamera

    1. Exit Terminal when complete, don’t forget to re-enable SIP on the Mac as well

    (Note you can also use chmod 200 instead of a-r if you prefer using numbers, the effect will be the same and permissions will be –w——-)

    After the Mac camera has been disabled this way, if you attempt to open FaceTime, Skype, Photo Booth, QuickTime, iMovie, or any other app which uses the built-in camera, you will get a message stating “there is no connected camera” on the Mac – which is exactly what you would want to see if you disabled the camera intentionally.

    Mac camera disabled as shown by no camera connected error message

    You should not need to reboot for the changes to take effect, though you may need to relaunch some active applications with camera access.

    How to Re-Enable the Camera on Mac

    Just as before when disabling the camera, to re-enable the Mac camera this way you will likely need to temporarily disable SIP in Mac OS before beginning. Then the commands to issue one by one are as follows:

    sudo chmod a+r /System/Library/Frameworks/CoreMediaIO.framework/Versions/A/Resources/VDC.plugin/Contents/MacOS/VDC

    sudo chmod a+r /System/Library/PrivateFrameworks/CoreMediaIOServicesPrivate.framework/Versions/A/Resources/AVC.plugin/Contents/MacOS/AVC

    sudo chmod a+r /System/Library/QuickTime/QuickTimeUSBVDCDigitizer.component/Contents/MacOS/QuickTimeUSBVDCDigitizer

    sudo chmod a+r /Library/CoreMediaIO/Plug-Ins/DAL/AppleCamera.plugin/Contents/MacOS/AppleCamera

    sudo chmod a+r /Library/CoreMediaIO/Plug-Ins/FCP-DAL/AppleCamera.plugin/Contents/MacOS/AppleCamera

    (Note you can also use chmod 755 instead of a+r if you prefer using numbers to return to -rwxr-xr-x, the effect will be the same)

    You’ll notice the difference between the enabling and disabling commands are simply the permissions change chmod command flag – has turned into a +, indicating the file(s) have read access now whereas before they did not, which is what prevented the camera from working. 

    If this approach is insufficient for your privacy or security needs for whatever reason, you’d likely need to go a step further and actually disassemble your Mac hardware to physically disconnect any camera cables, a task which is quite advanced but undeniably the most effective approach if you want to completely disable the Mac camera and don’t ever want the Macs camera to be used.

    Why would I want to disable the Mac camera?

    Most Mac users would not want to disable their FaceTime / iSight camera. Typically only very advanced Mac users who have a specific reason to completely disable the built-in camera on their Mac would want to do this, whether they are systems administrators, security professionals, for privacy reasons, or otherwise. This is not intended for the average Mac user. If you’re an average, casual, or novice Mac user who is concerned about privacy and any possible camera shenanigans, try putting tape on your web cam, like the FBI director does, which is much lower tech and less involved, easy to reverse, and quite effective since obviously if something is obstructing the camera lens than it is not usable.

     

    Categories: Sécurité, Système, Tutoriel Tags: ,

    If your iPhone, iPad, or iPod touch won‘t turn on or is frozen

    30/10/2017 Comments off

    If your device has a frozen screen or doesn’t respond when you touch it, or becomes stuck when you turn it on, learn what to do.

    If your screen is black or frozen

    If your screen is black or frozen, you might need to force restart your device. A force restart won’t erase the content on your device. You can force restart your device even if the screen is black or the buttons aren’t responding. Follow these steps:

    • On an iPhone 8 or iPhone 8 Plus: Press and quickly release the Volume Up button. Then press and quickly release the Volume Down button. Finally, press and hold the Side button until you see the Apple logo.
    • On an iPhone 7 or iPhone 7 Plus: Press and hold both the Side and Volume Down buttons for at least 10 seconds, until you see the Apple logo.
    • On an iPhone 6s and earlier, iPad, or iPod touch: Press and hold both the Home and the Top (or Side) buttons for at least 10 seconds, until you see the Apple logo.

    If your device still won’t turn on or start up

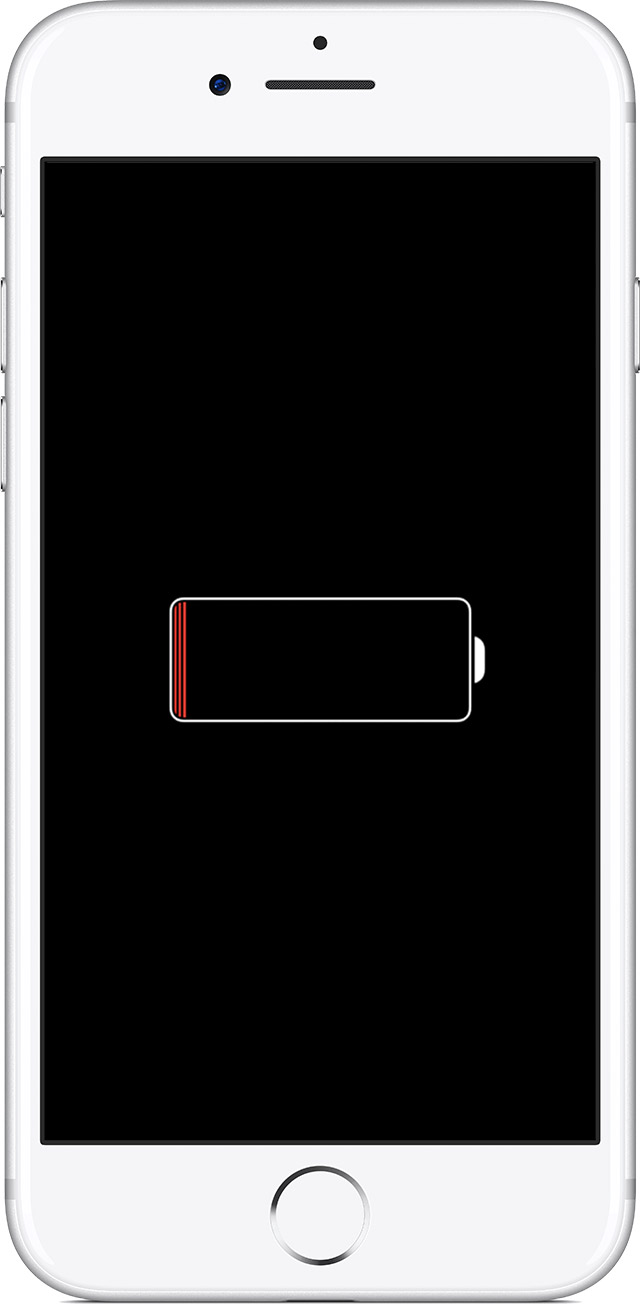
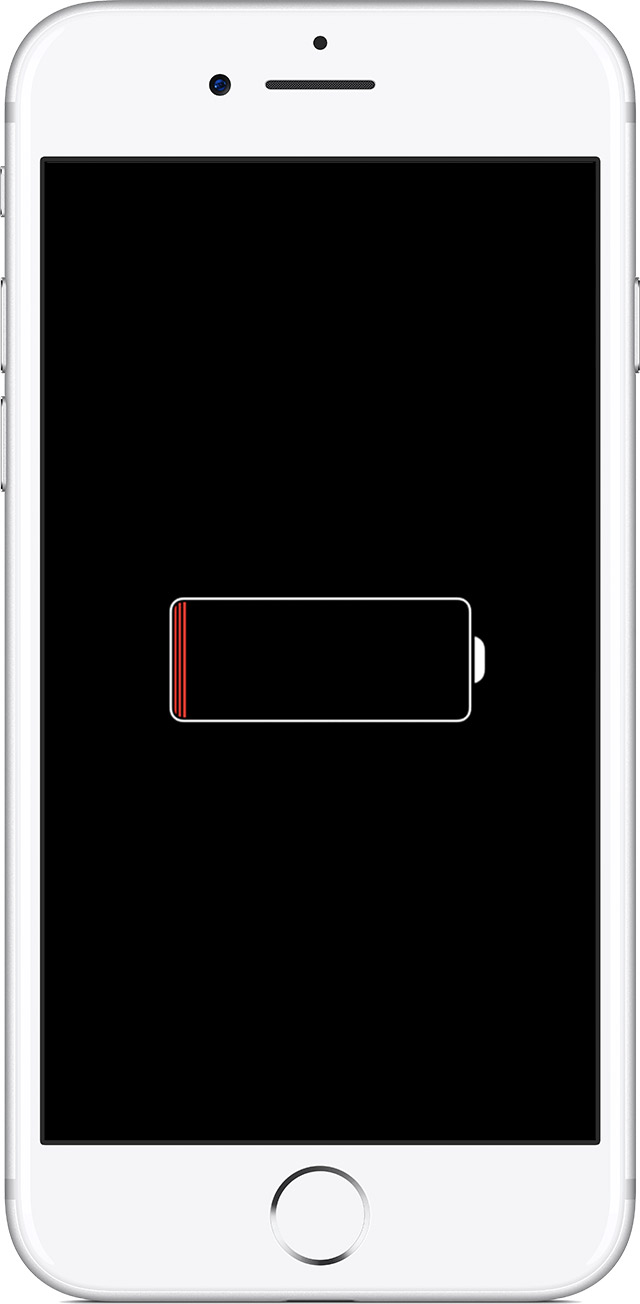
    Plug in your device and let it charge for up to one hour.

    After a few minutes, you should see the charging screen. 


    If you don’t see the charging screen within an hour, or you see the connect to power screen, check the jack, USB cable, and power adapter. Make sure that everything is plugged in firmly, free of debris, and not damaged. You might want to try a different USB cable or power adapter.

    If your device still doesn’t turn on, see what to do next.

    If your device turns on but gets stuck during start up

    If you see the Apple logo or a red or blue screen during startup, try these steps:

    1. Connect your device to a computer and open iTunes. If you don’t have a computer, try to borrow one, or go to an Apple Store or Apple Authorized Service Provider for help. 
    2. While your device is connected, force it to restart. 
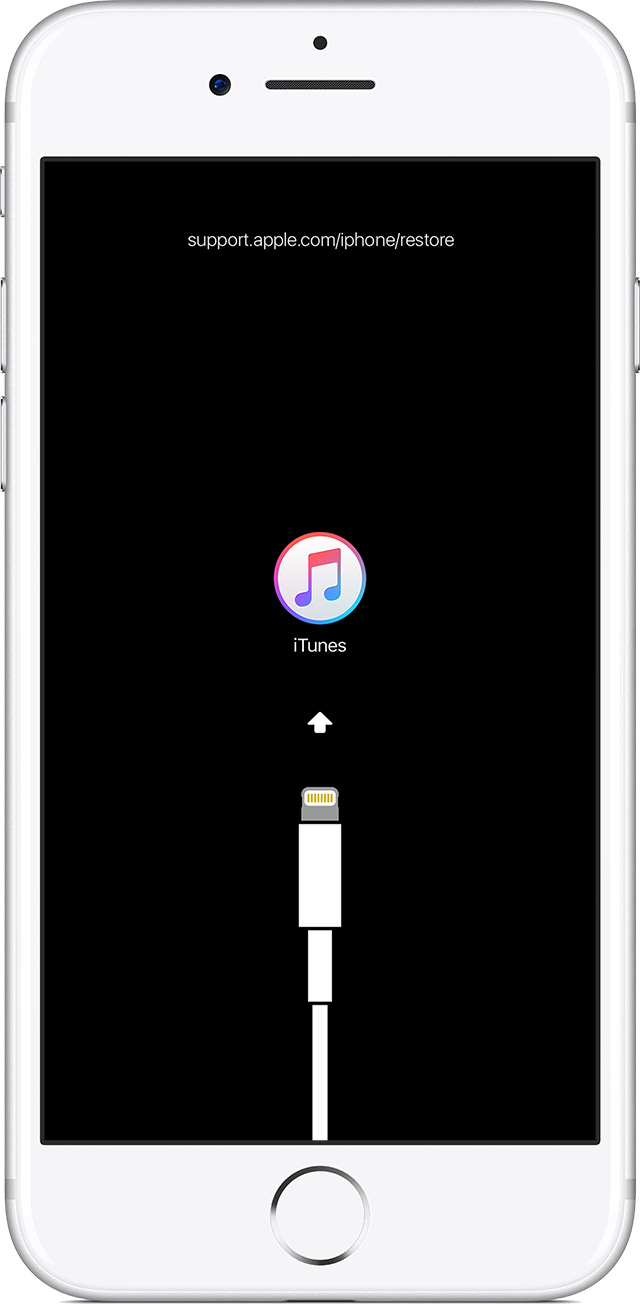
      • On an iPhone 8 or iPhone 8 Plus: Press and quickly release the Volume Up button. Then press and quickly release the Volume Down button. Finally, press and hold the Side button until you see the recovery-mode screen.
      • On an iPhone 7 or iPhone 7 Plus: Press and hold the Side and Volume Down buttons at the same time. Keep holding them until you see the recovery-mode screen.
      • On an iPhone 6s and earlier, iPad, or iPod touch: Press and hold both the Home and the Top (or Side) buttons at the same time. Keep holding them until you see the recovery-mode screen.
    3. Don’t release the buttons when you see the Apple logo. Keep holding until you see the recovery mode screen.


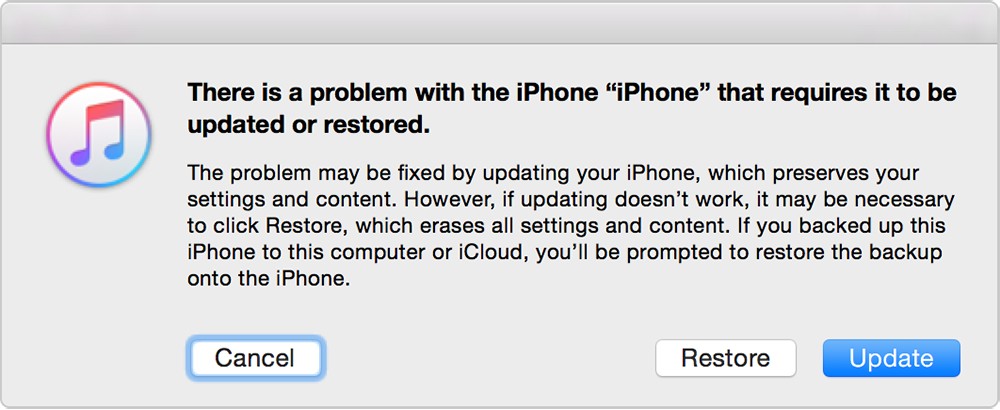
    1. When you get the option to restore or update, choose Update. iTunes will try to reinstall iOS without erasing your data.

    iTunes will download the software for your device. If it takes more than 15 minutes, your device will exit recovery mode and you’ll need to repeat steps 2 and 3.

     
    Categories: Constructeur, Matériel Tags: ,

    macOS Boot Option Cheatsheet

    16/10/2017 Comments off

    To access some specialized Mac features you’ll need to hold down one or more keys during startup. If you’re having trouble with your Mac, this can be a great way to troubleshoot and analyze your options.

    To use any of these boot keys, hold down the listed key combo as soon as you press your Mac’s power button. If you’re restarting your Mac, press and hold the keys immediately after your Mac begins to restart. Don’t release the keys until you see the described behavior.

    Shift: Start your Mac in Safe Mode. Since safe mode only loads essential software, you can determine whether a system process or a user-installed application is causing your problem.

    Option: Boot into Startup Manager. From here you can select different startup disks if any bootable partitions are available.

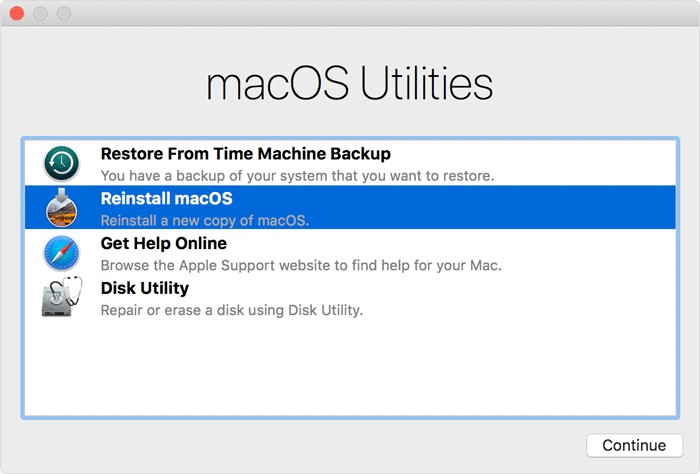
    Command + R: Boot into Recovery Mode. Recovery Mode is macOS’s powerful recovery suite with a bunch of options for saving or wiping your Mac. You can use it to reinstall macOS, restore from a Time Machine backup or use Disk Utility to repair or format your hard drive.

    Shift + Command + Option + R: Start in Internet Recovery Mode, skipping your system’s hard drive. This allows you to reinstall the build of macOS that came with your computer from the factory. macOS might do this one on its own if your installation is so messed up that you can’t boot into Recovery Mode.

    Command + S: Start in single user, command-line-only mode. This is useful for running diagnostic Terminal commands or fsck, but it can’t do much beyond that.

    Command + V: Boot in verbose mode. This mode displays logging and diagnostic messages as your Macboots. If your Mac is showing the Apple logo but failing to start completely, try this step to see where in the boot process the error occurs.

    Lire la suite…

    Categories: Constructeur, Système Tags: ,

    macOS High Sierra Supplemental Update Released for Mac Users

    06/10/2017 Comments off

    Apple has released the first supplemental update to macOS High Sierra 10.13, complete with bug fixes, improvements, and security fixes.

    General release notes accompanying the supplemental update suggests the release includes improvements to stability, reliability, and security. Specifically, the update is said to “improve installer robustness” (it is unclear if this addresses the issue where some users are unable to download a complete macOS High Sierra installer without third party utility assistance), includes a fix for cursor graphics bugs when using Adobe InDesign, and resolves and issue with Mail app was unable to delete email from Yahoo accounts. Additionally, the update includes a security fix to address a problem where Disk Utility could be used to reveal the password of an encrypted AFPS volume, and the update also resolves a security bug relating to Keychain passwords. Complete security update release notes are below for those interested. The supplemental update is recommended for all macOS High Sierra users to install.

    Mac users running macOS 10.13 High Sierra can find the update available to download and install now in the Mac App Store Updates section. The update is labeled as “macOS High Sierra 10.13 Supplemental Update”.

    Note the supplemental update is separate from the beta versions of 10.13.1 currently under the beta testing programs.

    Always back up a Mac before installing any system software update, including smaller bug fix updates like this macOS High Sierra Supplemental Update.

    The complete security related supplemental update release notes are as follows:

    macOS High Sierra 10.13 Supplemental Update
    Released October 5, 2017
    StorageKit
    Available for: macOS High Sierra 10.13
    Impact: A local attacker may gain access to an encrypted APFS volume
    Description: If a hint was set in Disk Utility when creating an APFS encrypted volume, the password was stored as the hint. This was addressed by clearing hint storage if the hint was the password, and by improving the logic for storing hints.
    CVE-2017-7149: Matheus Mariano of Leet Tech
    Security
    Available for: macOS High Sierra 10.13
    Impact: A malicious application can extract keychain passwords
    Description: A method existed for applications to bypass the keychain access prompt with a synthetic click. This was addressed by requiring the user password when prompting for keychain access.
    CVE-2017-7150: Patrick Wardle of Synack
    New downloads of macOS High Sierra 10.13 include the security content of the macOS High Sierra 10.13 Supplemental Update.

    Separately, iPhone and iPad users can find iOS 11.0.2 available as an update, which also includes various bug fixes for that system software release, and watchOS 4.0.1 for Apple Watch is out as well.

    Categories: Constructeur, Logiciel Tags: ,