Archive

Articles taggués ‘administration’

inotify / incron : Lancer une commande en cas d’action sur un fichier/un répertoire

25/06/2024 Comments off

“inotify”, Remplaçant de “dnotify”, est une technologie, intégrée au noyau Linux (>=2.6.13) , destinée à notifier les événements, modifications, accès, etc, effectués sur le contenu d’un système de fichiers en ce basant sur le contrôle des “inodes” (structures de données contenant des informations sur les fichiers d’un systèmes de fichiers).

« incron« , Pour « INotify CRON », permet d’exploiter les informations « d’inotify » afin d’effectuer une action, commande(s), scripts, etc, en cas de modifications de fichiers ou de répertoires donnés.

Installation de inotify

« inotify » Est intégré au noyau et est activé dans les kernels fournis par les distributions.

« incron » Est, de son côté, empaqueté sur la plupart des distributions mais nécessitera, sur Red Hat et ses dérivées (CentOS, Scientific Linux, etc) l’ajout des miroirs EPEL (« Extra Packages for Enterprise Linux » voir « Ajout des miroirs EPEL (Extra Packages for Enterprise Linux) sous Red Hat like (CentOS, RHEL, SL, …) » sur Admin Linux). L’installation s’effectue via le gestionnaire de paquet de votre distribution.

Sous Ubuntu, Debian et ses dérivés :

# apt-get install incron

Sous les dérivés de Red Hat :

# yum install incron

Sous Gentoo Linux « emerge » se chargera de l’installation tous comme « pacman » le fera très bien sous Arch Linux.
Lire la suite…

80 Linux Monitoring Tools for SysAdmins

22/06/2024 Comments off

Source: ServerDensity

The industry is hotting up at the moment, and there are more tools than you can shake a stick at. Here lies the most comprehensive list on the Internet (of monitoring tools). Featuring over 80 ways to monitor your machines. Within this article we outline:

  • Command line tools
  • Network related
  • System related monitoring
  • Log monitoring tools
  • Infrastructure monitoring tools

It’s hard work monitoring and debugging performance problems, but it’s easier with the right tools at the right time. But how much of your valuable time do you think it would take you to investigate all of these tools and find out which one is best for you?

Why not check out Server Density first, it has a beautiful UI, an api that’s easy to use and alerts that will keep downtime to a minimum.

Top 10  System Monitoring Tools

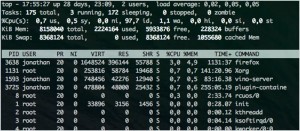
1. Top

top
This is a small tool which is pre-installed in many unix systems. When you want an overview of all the processes or threads running in the system: top is a good tool. You can order these processes on different criteria and the default criteria is CPU.

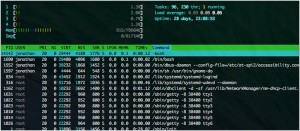
2. htop

htop
Htop is essentially an enhanced version of top. It’s easier to sort by processes. It’s visually easier to understand and has built in commands for common things you would like to do. Plus it’s fully interactive.

3. atop

Atop monitors all processes much like top and htop, unlike top and htop however it has daily logging of the processes for long-term analysis. It also shows resource consumption by all processes. It will also highlight resources that have reached a critical load.

4. apachetop

Apachetop monitors the overall performance of your apache webserver. It’s largely based on mytop. It displays current number of reads, writes and the overall number of requests processed.

5. ftptop

ftptop gives you basic information of all the current ftp connections to your server such as the total amount of sessions, how many are uploading and downloading and who the client is.

Lire la suite…

Categories: Système Tags: ,

4 outils utiles pour rechercher et supprimer des fichiers en double sous Linux

20/06/2024 Comments off

L’organisation de votre répertoire personnel ou même de votre système peut être particulièrement difficile si vous avez l’habitude de télécharger toutes sortes de choses sur Internet.

Souvent, vous constaterez que vous avez téléchargé le même mp3, pdf, epub (et toutes sortes d’autres extensions de fichiers) et que vous l’avez copié dans différents répertoires. Cela peut encombrer vos répertoires de toutes sortes de choses dupliquées inutiles.

Dans ce didacticiel, vous allez apprendre à rechercher et à supprimer des fichiers en double sous Linux à l’aide des outils de ligne de commande rdfind et fdupes, ainsi qu’à l’aide d’outils d’interface graphique appelés DupeGuru et FSlint.

Une note de prudence – faites toujours attention à ce que vous supprimez sur votre système car cela peut entraîner une perte de données indésirable. Si vous utilisez un nouvel outil, essayez-le d’abord dans un répertoire de test où la suppression de fichiers ne posera pas de problème.

Rdfind – Trouve les fichiers en double sous Linux

Rdfind provient de la recherche de données redondantes. C’est un outil gratuit utilisé pour trouver des fichiers en double dans ou dans plusieurs répertoires. Il utilise la somme de contrôle et trouve les doublons basés sur le fichier contient non seulement des noms. Lire la suite…

Categories: Système Tags: , , ,

Linux Users and Sudo

05/06/2024 Comments off

Introduction

users sudoBefore we proceed, it would be best to cover some basic user administration topics that will be very useful in later chapters. Adding Users

One of the most important activities in administering a Linux box is the addition of users. Here you’ll find some simple examples to provide a foundation for future chapters. It is not intended to be comprehensive, but is a good memory refresher. You can use the command man useradd to get the help pages on adding users with the useradd command or the man usermod to become more familiar with modifying users with the usermod command.

Who Is the Super User?

The super user with unrestricted access to all system resources and files in Linux is the user named root. This user has a user ID, of 0 which is universally identified by Linux applications as belonging to a user with supreme privileges. You will need to log in as user root to add new users to your Linux server.

Debian Note: When installing Ubuntu Linux systems, you are prompted to create a primary user that is not root. A root user is created but no password is set, so you initially cannot log in as this user. The primary user can become the root user using the sudo su - command that will be discussed later.

How To Add Users

Adding users takes some planning; read through these steps below before starting:

1) Arrange your list of users into groups by function. In this example there are three groups « parents« , « children » and « soho« .

Parents    Children     Soho
Paul       Alice        Accounts
Jane       Derek        Sales

2) Add the Linux groups to your server:

[root@bigboy tmp]# groupadd parents
[root@bigboy tmp]# groupadd children
[root@bigboy tmp]# groupadd soho

3) Add the Linux users and assign them to their respective groups

[root@bigboy tmp]# useradd -g parents paul
[root@bigboy tmp]# useradd -g parents jane
[root@bigboy tmp]# useradd -g children derek
[root@bigboy tmp]# useradd -g children alice
[root@bigboy tmp]# useradd -g soho accounts
[root@bigboy tmp]# useradd -g soho sales

If you don’t specify the group with the -g, RedHat/Fedora Linux creates a group with the same name as the user you just created; this is also known as the User Private Group Scheme. When each new user first logs in, they are prompted for their new permanent password.

4) Each user’s personal directory is placed in the /home directory. The directory name will be the same as their user name.

[root@bigboy tmp]# ll /home
drwxr-xr-x 2 root root 12288 Jul 24 20:04 lost found
drwx------ 2 accounts soho 1024 Jul 24 20:33 accounts
drwx------ 2 alice children 1024 Jul 24 20:33 alice
drwx------ 2 derek children 1024 Jul 24 20:33 derek
drwx------ 2 jane parents 1024 Jul 24 20:33 jane
drwx------ 2 paul parents 1024 Jul 24 20:33 paul
drwx------ 2 sales soho 1024 Jul 24 20:33 sales
[root@bigboy tmp]#

Lire la suite…

tmux & screen cheat-sheet

02/06/2024 Comments off

screen and tmux

A comparison of the features (or more-so just a table of notes for accessing some of those features) for GNU screen and BSD-licensed tmux.

The formatting here is simple enough to understand (I would hope). ^ means ctrl+, so ^x is ctrl+x. M- means meta (generally left-alt or escape)+, so M-x is left-alt+x

It should be noted that this is no where near a full feature-set of either group. This – being a cheat-sheet – is just to point out the most very basic features to get you on the road.

Trust the developers and manpage writers more than me. This document is originally from 2009 when tmux was still new – since then both of these programs have had many updates and features added (not all of which have been dutifully noted here).

Actiontmuxscreen
start a new sessiontmux OR
tmux new OR
tmux new-session
screen
re-attach a detached sessiontmux attach OR
tmux attach-session
screen -r
re-attach an attached session (detaching it from elsewhere)tmux attach -d OR
tmux attach-session -d
screen -dr
re-attach an attached session (keeping it attached elsewhere)tmux attach OR
tmux attach-session
screen -x
detach from currently attached session^b d OR
^b :detach
^a ^d OR
^a :detach
rename-window to newname^b , <newname> OR
^b :rename-window <newn>
^a A <newname>
list windows^b w^a w
list windows in chooseable menu ^a « 
go to window #^b #^a #
go to last-active window^b l^a ^a
go to next window^b n^a n
go to previous window^b p^a p
see keybindings^b ?^a ?
list sessions^b s OR
tmux ls OR
tmux list-sessions
screen -ls
toggle visual bell ^a ^g
create another window^b c^a c
exit current shell/window^d^d
split window/pane horizontally^b « ^a S
split window/pane vertically^b %^a |
switch to other pane^b o^a <tab>
kill the current pane^b x OR (logout/^D) 
collapse the current pane/split (but leave processes running) ^a X
close other panes except the current one^b ! 
cycle location of panes^b ^o 
swap current pane with previous^b { 
swap current pane with next^b } 
show time^b t 
show numeric values of panes^b q 
toggle zoom-state of current pane (maximize/return current pane^b z 
break the current pane out of its window (to form new window)^b ! 

Source: dayid.org