Archive

Archives pour la catégorie ‘Logiciel’

How to set up a self-hosted project management web app on Linux

01/12/2023 Comments off

When a group of employees collaborate on a project, there is need for handling all aspects and complexities of the project from start to finish, such as task assignment, scheduling, budget management, communication, documentation, and so on. Thus a good project management tool is a necessity for any kinds of businesses or organizations which are involved in a lot of collaborative projects.

Especially web-based online project management tools are the top choice for such environments as different project members can access and share the online tools wherever they are. If your organization requires good web-based project management software, you will find ONLYOFFICE a viable candidate.

ONLYOFFICE is a free and open source office suite that enables seamless project collaboration in the web-based environment. It offers different management tools for documents, emails, events, tasks and client relations. Using ONLYOFFICE, a project manager can schedule the workflow, lead discussions, monitor and coordinate the project progress using Gantt Chart and reports.

In this tutorial, I will describe the main project management features offered by ONLYOFFICE and give some tips to use them more efficiently.

Installing ONLYOFFICE using Docker on Linux

The easiest way to install ONLYOFFICE is by using Docker. The tutorial presented here covers the Docker-based installation instructions for the whole ONLYOFFICE system with online editors integrated for real-time document collaboration.

If you want to install ONLYOFFICE without editors (called « community server »), simply execute the following command:

$ sudo docker run -i -t -d -p 80:80 -p 443:443 -p 5222:5222 onlyoffice/communityserver

The above command will download the official ONLYOFFICE Docker image with all dependencies needed for its correct work. For more installation and configuration tips, please refer to the ONLYOFFICE official documentation.

Running a Self-Hosted Web Office

To open your web office, enter in the address bar of your browser localhost (http://IP-Address/) on which the docker is running. The Welcome page will open:

Enter a password and specify the email address you will use to access your office the next time.

Getting Started with a New Project

First, click the Projects link to open the project management tool. To start a new project, click on the Create New…button in the upper left corner and select the Project option from the drop-down list. Fill out the form: specify your project Title and enter a short Description. If necessary, assign a Project Manager and create a project Team.

To restrict access to the newly created project, check the Save this project as private box. Review the project settings and click on the Save button.

Note: to create a new portal, the full privilege administrator or projects management administrator rights are required.

Setting up Your Project Hierarchy

Once the project is started, the next step is to create the project hierarchy which involves the following:

  • Set up project key points with milestones
  • Distribute the whole amount of work among the team members using tasks
  • Link tasks to determine the order in which they need to be performed
  • Divide a task into subtasks if it requires several persons to perform several steps


Organize Project Documentation

Keep all the documentation related to your project in one place to access it anytime anywhere. Switch to theDocuments tab on your project page to:

  • Upload documents from your hard disk drive
  • Download an existing document to your hard disk drive
  • Filter and sort documents to facilitate the search
  • Copy or move documents to another folder
  • Create a new document, spreadsheet or presentation, open and edit the existing ones if the online editorsare installed
  • Attach documents to the related tasks

Managing Access Rights

Being a project manager you can manage the project team, tasks, milestones, discussions, comments inside your project; change project status, edit its settings, and also set access rights to project team members for a private project.

By default, each member of your project team can add tasks, assign them to himself or other team members and manage them; start new discussions; add and remove documents; view all content inside your project: milestones, tasks, documents, discussions and contacts.

To restrict the access to an item, switch to the Team tab on your project page, select the team member you wish to set access rights for, and click on one of the links to the right: Discussions, Documents, All Tasks, Milestones,Contacts.

Note: you can set the access rights for each team member unless he/she does not have full privilege administrator or projects management administrator rights.

Monitoring Project using Gantt Chart

Making changes to your project once it is underway is both indispensable and inevitable part of its life cycle. The simplest way to do it with ONLYOFFICE, especially when you manage multiple related projects, is to use Gantt Chart, a bar chart used to illustrate a project schedule.

To open Gantt Chart, click on the Gantt Chart link on the left side panel, or click on the Gantt Chart button in the upper right corner of your project page.

Gantt Chart gives you a panoramic view of all your project activities and allows you to:

  • Select one or several projects you wish to coordinate
  • View and change the project activity status: open/closed, active/overdue
  • Manage the project milestones and tasks: create, edit, close, reopen, delete, etc.
  • Link the tasks within your project to show the task dependencies

Useful Tips

1. Leading discussions

To find a solution of problems occurred, you can start a project-related discussion and discuss the issue with your project team within the Discussion tab.

2. Using templates

To easily start a new project, you can use the previously created templates (click on the Create New… button and select the Project Template option to create one).

3. Reporting

To keep up with what each team member is doing, make use of the Reports system. Click on the corresponding link on the left-side panel and generate a report or set up needed parameters once and regularly receive automatic reports by email on certain date and time.
 
Source: Xmodulo
Categories: Logiciel Tags:

Five reliable Windows Server backup solutions

30/11/2023 Comments off

When disaster strikes (and it will), you can put the pieces back together if you’ve got a solid backup solution in place.

If you have a Windows server and you’re not backing it up, you are tempting fate. It’s only a matter of time before something tragic will happen: a hardware failure, a hacker, or a corrupted Windows update. Something will bring that server down and do everything it can to take your data with it.

Luckily, several reliable backup solutions are available for the Windows Server environment. They aren’t perfect. But the five solutions discussed here have their strengths and can be depended upon to keep your data safe. Now, before I reveal the big five, I want to make sure you understand how critical it is to be backing up that data to an external drive and to rotate that drive offsite. If you’re backing up drives and leaving everything onsite, should a fire (or some other catastrophe) occur, that data will be lost.

Note: This list is also available as a photo gallery.

1: Acronis Backup and Restore (with Universal Restore)

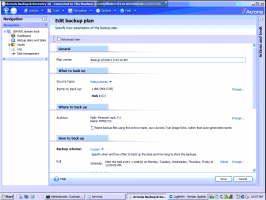
Acronis Backup and Restore (Figure A) is the backup tool I use the most. It’s costly but well worth it. The newer version of Acronis does a great job of ensuring that there is room on your external drive for your latest backup. You can overwrite the old backup or go by the traditional cleanup rules established in Acronis Echo. But if you go the Acronis route, you should also purchase the Universal Restore feature. With this tool, you can take a full image of a backup and restore it to any hardware — so long as it meets the requirements of your platform. That way, you don’t need an exact duplicate of your server hardware sitting around waiting to have an image restored onto it. Acronis also has add-ons for Exchange and SQL Servers.

Figure A


Acronis backup
Acronis Backup and Restore

2: Symantec Backup Exec

Symantec Backup Exec (Figure B) is a powerful backup solution that does a great job of « just working. » And with its at-a-glance calendar, it’s easy to know when your backup has succeeded and when it has worked. If you’re using Symantec Backup Exec across a network (to back up clients/hosts), you can feel safe because it uses SSL for all network backup connections. Like Acronis, Symantec offers solutions for Exchange and SQL. Also, the ability to manage Vaults (backup destinations) is superb with Symantec. Just make sure that if a Vault is physically (and permanently) removed, you remove it from within the backup software. Otherwise, it will cause problems.

Figure B

Symantec Backup Exec

Symantec Backup Exec

3: Carbonite

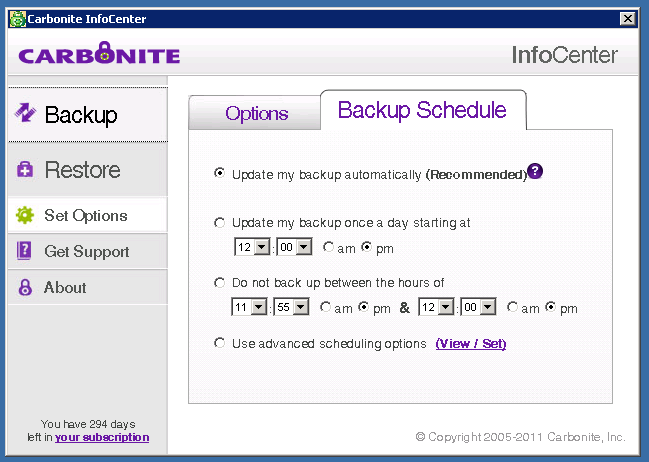
Carbonite (Figure C) is primarily an online backup (although the Business and BusinessPremier plans allow you to back up to an external drive). It’s meant to back up data only. Carbonite is probably one of the most reliable online backup tools and can back up email, documents, POS files, financial data, pictures and other multimedia, and more. But to use Carbonite for Windows Server, you must use the BusinessPremier Plan ($229.00 per year), which will allow you to include as many servers running Window Server 2003/2008/2011 as you like. Unlike Acronis, you won’t be backing up an image of your server with Carbonite — it’s a data-only backup tool. But it’s an excellent addition to any onsite backup solution.

Figure C

Carbonite

Carbonite

4: Windows NT Backup

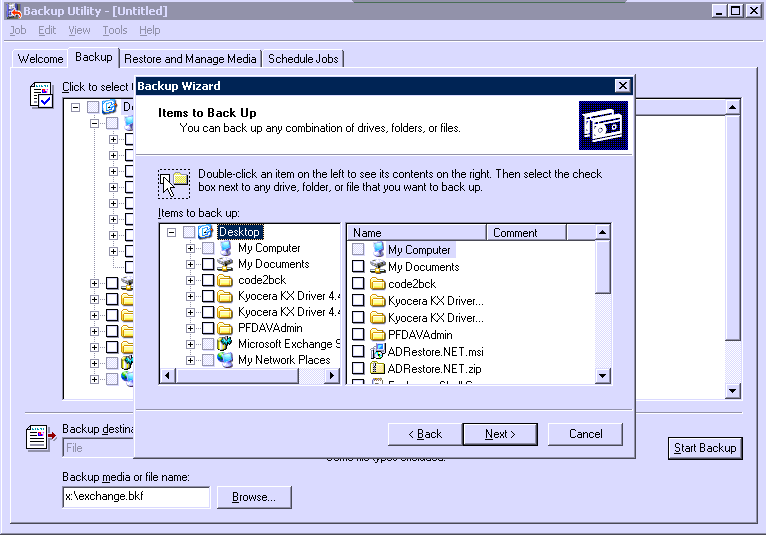
Windows NT Backup (Figure D) is the free backup solution that comes with any Windows Server. Why do I include it here? Although it just does data backup and doesn’t offer many of the bells and whistles of the other tools, it is one of the only truly reliable backup solutions that will clear the Exchange logs for you. I always set up an NT Backup to run once a week (or month, depending upon the needs), just to have it clear the Exchange logs. Otherwise, you’ll be including a lot of unnecessary data in your backups, causing their size to get out of hand.

Figure D

Windows NT Backup

Windows NT Backup

5: ShadowProtect 4 (Server)

ShadowProtect 4 (Figure E) is probably the least-known product in this list. But it falls into place next to Acronis as a feature-rich tool that can do everything — including recover to dissimilar hardware. ShadowProtect 4 also includes an easy-to-use tool that allows you to consolidate backup image files and convert the backups to either .VHD or .VMDK virtual machines. Another outstanding feature is its granular recovery, which allows for the quick recovery of individual files from within a backup. Unique to ShadowProtect is the Virtual Boot technology, which provides for automatic failover to a virtual server.

Figure E

ShadowProtect

ShadowProtect 4

Which backup?

Every company needs a backup plan. How far you go with your backup depends upon the size of the company, your needs, and your budget. But any of the above solutions will serve as a great place to start — or stop — for your Windows Server backup needs. Do you have a different backup solution to add to the list? Share your recommendations with fellow TechRepublic members.

 
Source: Jack Wallen – TechRepublic
Categories: Logiciel Tags: , ,

How to Set a Minimum Word Count for WordPress Posts

30/11/2023 Comments off

minimum word count wordpressMinimum Word Count

Do you run a blog with multiple authors? Then, you probably have wondered how you can set a minimum word count for your posts in WordPress. In this article, we will share with you a snippet that lets you set a minimum Word count for your WordPress posts. If a user tries to publish a post that is too small, then it will return an error telling them the post is not long enough.

Simply open your theme’s functions.php file and paste the following code:

function minWord($content)
{
	global $post;
	$content = $post->post_content;
	if (str_word_count($content) < 100 ) //set this to the minimum number of words
	wp_die( __('Error: your post is below the minimum word count. It needs to be longer than 100 words.') );
}
add_action('publish_post', 'minWord');

You may change the minimum number of words from 100 to whatever you like. You can also customize the error to make it helpful.

Source: wpbeginner.com

Categories: Logiciel Tags:

What is a Distributed Firewall?

24/11/2023 Comments off

In the post “What is Network Virtualization?” I described a model where the application’s complete L2-L7 virtual network is decoupled from hardware and moved into a software abstraction layer for the express purpose of automation and business agility. In this post I’ll focus on network security, and describe an imminent firewall form factor enabled by Network Virtualization — the Distributed Firewall.

ALL YOUR PACKET ARE BELONG TO US

If InfoSec ruled the world … well, OK, maybe not the world … if InfoSec ruled the data center network design, and if money was no object, we would probably have something like this. Every server in the data center directly connected to its own port on one massive firewall. Every packet sent from every server would be inspected against a stateful security policy before going anywhere. And every packet received by every server would pass one final policy check before hitting the server’s NIC receive buffer. The firewall wouldn’t care about the IP address of the servers, for the simple reason that it’s directly connected to every server. E.g. “The server on this port can talk to the server on that port, on TCP port X”. And if that wasn’t good enough, the firewall knows everything about the servers connected to it, and can create rules around a rich set of semantics. All of this with no performance penalty. That would be awesome, right?

Let’s pretend money was not the issue. How would you design this massive omnipresent data center firewall? I can think of three ways off hand.

  1. You design a monstrous power sucking stateful firewall chassis with thousands of line-rate ports. At this point it’s time to route a ghastly mess of cables from every server to this centralized mega firewall core chassis – but that’s somebody else’s problem. Oh, and don’t forget you’ll need two of those bad boys for “redundancy”. Your monster firewall is pretty freaking awesome at security, but only so-so at basic L2 and L3 networking. But so what — the network team can learn to like it or find a new job. And if you run out of ports … no worries; just wait another few years for a bigger chassis and do the rip/replace routine.
  2. You design a line rate stateful firewall ToR switch. Rip out the network team’s favorite ToR and put this one in its place. Tell them to stop throwing a fit and just deal with it. You’ll have hundreds of these ToR firewalls to manage and configure consistently. No problem … just let the network team re-apply for their jobs as firewall engineers.

Go ahead and pinch yourself now. This is nothing but a fantasy nightmare.

The interests of security often poorly translate into networking. Comprehensive security ~= Compromisednetworking.

What about design #3? More on that in a minute. (Hint: title of the post)

In the real world, rest assured we do have firewalls to provide some security. But this security is not ubiquitous, nor is it assured. Instead, we have firewalls (physical or virtual) hanging off the network somewhere catching steered packets – and we can only hope the network was configured correctly to steer the right traffic to the right policy.

In this post we’ll briefly review the physical and virtual firewall, followed by a discussion on the Distributed Firewall.

Lire la suite…

Categories: Logiciel, Réseau Tags:

How to set up web-based network traffic monitoring system on Linux

23/11/2023 Comments off

When you are tasked with monitoring network traffic on the local network, you can consider many different options to do it, depending on the scale/traffic of the local network, monitoring platforms/interface, types of backend database, etc.

ntopng is an open-source (GPLv3) network traffic analyzer which provides a web interface for real-time network traffic monitoring. It runs on multiple platforms including Linux and MacOS X. ntopng comes with a simple RMON-like agent with built-in web server capability, and uses Redis-backed key-value server to store time series statistics. You can install ntopng network traffic analyzer on any designated monitoring server connected to your network, and use a web browser to access real-time traffic reports available on the server.

In this tutorial, I will describe how to set up a web-based network traffic monitoring system on Linux by using ntopng.

Features of ntopng

  • Flow-level, protocol-level real-time analysis of local network traffic.
  • Domain, AS (Autonomous System), VLAN level statistics.
  • Geolocation of IP addresses.
  • Deep packet inspection (DPI) based service discovery (e.g., Google, Facebook).
  • Historical traffic analysis (e.g., hourly, daily, weekly, monthly, yearly).
  • Support for sFlow, NetFlow (v5/v9) and IPFIX through nProbe.
  • Network traffic matrix (who’s talking to who?).
  • IPv6 support.

Install ntopng on Linux

The official website offers binary packages for Ubuntu and CentOS. So if you use either platform, you can install these packages.

If you want to build the latest ntopng from its source, follow the instructions below. (Update: these instructions are valid for ntopng 1.0. For ntopng 1.1 and higher, see the updated instructions).

To build ntopng on Debian, Ubuntu or Linux Mint:

$ sudo apt-get install libpcap-dev libglib2.0-dev libgeoip-dev redis-server wget libxml2-dev
$ tar xzf ntopng-1.0.tar.gz -C ~
$ cd ~/ntopng-1.0/
$ ./configure
$ make geoip
$ make

In the above steps, « make geoip » will automatically download a free version of GeoIP databases with wget from maxmind.com. So make sure that your system is connected to the network.

To build ntopng on Fedora:

$ sudo yum install libpcap-devel glib2-devel GeoIP-devel libxml2-devel libxml2-devel redis wget
$ tar xzf ntopng-1.0.tar.gz -C ~
$ cd ~/ntopng-1.0/
$ ./configure
$ make geoip
$ make

To install ntopng on CentOS or RHEL, first set up EPEL repository, and then follow the same instructions as in Fedora above.

Configure ntopng on Linux

After building ntopng, create a configuration directory for ntopng, and prepare default configuration files as follows. I assume that « 192.168.1.0/24 » is the CIDR address prefix of your local network.

$ sudo mkir /etc/ntopng -p
$ sudo -e /etc/ntopng/ntopng.start
--local-networks "192.168.1.0/24"
--interface 1
$ sudo -e /etc/ntopng/ntopng.conf
-G=/var/run/ntopng.pid

Lire la suite…