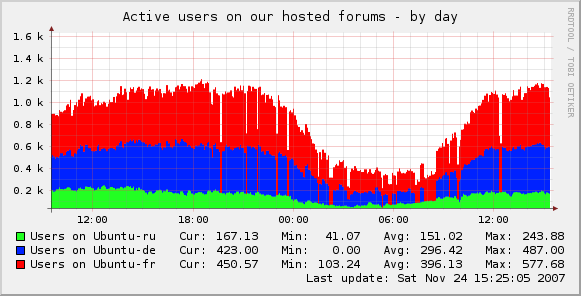
Nous avons installé fail2ban sur chacun de nos serveurs en utilisant ce tutoriel
Le script de monitoring que nous allons utiliser se trouve ici : http://blog.sinnwidrig.org/?p=50. C’est un script générique permettant de créer un graphique distinct par action de fail2ban.
On décide de placer les plugins supplémentaires pour munin dans le répertoire  /opt/share/munin/plugins
#Créer le répertoire des plugins dans le cas ou il n'existe pas déjà
sudo mkdir -p /opt/share/munin/plugins
cd /opt/share/munin/plugins
# Récupérer le script
sudo wget http://blog.sinnwidrig.org/files/fail2ban_-0.1
# Rendre exécutable le script
sudo chmod +x fail2ban_-0.1
Munin est un outil de monitoring fonctionnant par script et collectant des informations sur le systeme à interval régulier (5min par défaut), Munin affiche des graphiques concernants des informations qu’il collecte dans /proc. Les graphiques sont accessibles via apache, il faut donc également sécuriser l’accès à celui-ci. Il faut installer trois choses différentes :
le programme munin,
le daemon munin-node qui va monitorer les informations système,
et apache2 qui nous permettra de visualiser les graphiques.
Here are some basic munin plugins for snort using perfmon (Enable preprocessor perfmonitor in snort.conf) The snort.conf entry should look something like:
preprocessor perfmonitor: time 300 file /your/path/to/snort.stats pktcnt 5000
(Read the snort docs for more info on performance issues etc.)
Today I found myself reconfiguring a wireless access point I hadn’t used in a very long time. I no longer have the manual (so I could reset it to factory defaults) nor do I remember what the obscure IP address I configured it with was. Luckily I do know what network it’s setup for ( 192.168.1.x ) but I don’t want to have to try to connect to all 254 IP addresses (192.168.1.1 through 192.168.1.254) as that would take quite some time.
So what I’m going to do is use Nmap a swiss army knife for network operators and system admins. What we’re going to do is use Nmap to scan the entire network and tell us which IP addresses are active. This will allow us to drastically reduce the number of IP addresses we have to try.
There are Nmap versions for all three major OS’s *nix, OS X and Windows. I’ll be showing you the syntax for the *nix/OS X version.
nmap -sP 192.168.1.0/24
replace 192.168.1.0/24 with whatever network it is you’re trying to scan. The /24 is the netmask of the network in CDIR notation. If you need a cheat sheet you can find one here
Once you press return (or enter) Nmap will start to work pinging each and every IP address on your network and noting which ones respond and which don’t. (Note that if your device has a firewall that discards ping requests it will appear to be down to this scan)
You’ll quickly get an output similar to the following
Starting Nmap 4.50 ( http://insecure.org ) at 2008-08-19 10:15 PDT
HOST 192.168.1.25 appears to be up.
MAC Address: 0:0F:1F:4C:0B:E6 (WW Pcba Test)
Nmap finished: 256 IP addresses (3 hosts up) scanned in 5.711 seconds
Un jour vous pouvez resté bloqué par un mot de passe perdu pour accéder à Webmin et vous auriez besoin d’un moyen de le changer.
Voici comment: pour commencer, connectez-vous à votre système en ssh.Vous devez trouver où Webmin est installé et donc le chemin que le script utilisera pour réinitialiser le mot de passe. Lire la suite…