Archive

Archives pour la catégorie ‘Système’

How to list the crontabs for all users?

09/01/2024 Comments off

I ended up writing a script (I’m trying to teach myself the finer points of bash scripting, so that’s why you don’t see something like Perl here). It’s not exactly a simple affair, but it does most of what I need. It uses Kyle’s suggestion for looking up individual users’ crontabs, but also deals with /etc/crontab(including the scripts launched by run-parts in /etc/cron.hourly, /etc/cron.daily, etc.) and the jobs in the /etc/cron.d directory.source: How do I list all cron jobs for all users?

I ended up writing a script (I’m trying to teach myself the finer points of bash scripting, so that’s why you don’t see something like Perl here). It’s not exactly a simple affair, but it does most of what I need. It uses Kyle’s suggestion for looking up individual users’ crontabs, but also deals with /etc/crontab(including the scripts launched by run-parts in /etc/cron.hourly, /etc/cron.daily, etc.) and the jobs in the /etc/cron.d directory.

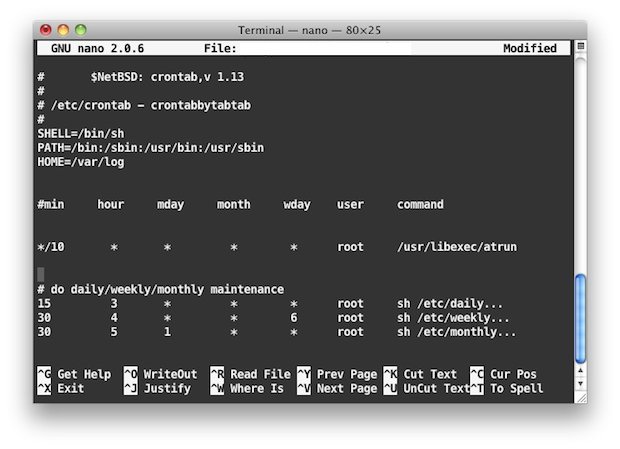
It takes all of those and merges them into a display something like the following:

#!/bin/bash
# System-wide crontab file and cron job directory. Change these for your system.
 CRONTAB='/etc/crontab'
 CRONDIR='/etc/cron.d'
# Single tab character. Annoyingly necessary.
 tab=$(echo -en "\t")
# Given a stream of crontab lines, exclude non-cron job lines, replace
 # whitespace characters with a single space, and remove any spaces from the
 # beginning of each line.
 function clean_cron_lines() {
 while read line ; do
 echo "${line}" |
 egrep --invert-match '^($|\s*#|\s*[[:alnum:]_]+=)' |
 sed --regexp-extended "s/\s+/ /g" |
 sed --regexp-extended "s/^ //"
 done;
 }
# Given a stream of cleaned crontab lines, echo any that don't include the
 # run-parts command, and for those that do, show each job file in the run-parts
 # directory as if it were scheduled explicitly.
 function lookup_run_parts() {
 while read line ; do
 match=$(echo "${line}" | egrep -o 'run-parts (-{1,2}\S+ )*\S+')
if [[ -z "${match}" ]] ; then
 echo "${line}"
 else
 cron_fields=$(echo "${line}" | cut -f1-6 -d' ')
 cron_job_dir=$(echo "${match}" | awk '{print $NF}')
if [[ -d "${cron_job_dir}" ]] ; then
 for cron_job_file in "${cron_job_dir}"/* ; do # */
 [[ -f "${cron_job_file}" ]] && echo "${cron_fields} ${cron_job_file}"
 done
 fi
 fi
 done;
 }
# Temporary file for crontab lines.
 temp=$(mktemp) || exit 1
# Add all of the jobs from the system-wide crontab file.
 cat "${CRONTAB}" | clean_cron_lines | lookup_run_parts >"${temp}"
# Add all of the jobs from the system-wide cron directory.
 cat "${CRONDIR}"/* | clean_cron_lines >>"${temp}" # */
# Add each user's crontab (if it exists). Insert the user's name between the
 # five time fields and the command.
 while read user ; do
 crontab -l -u "${user}" 2>/dev/null |
 clean_cron_lines |
 sed --regexp-extended "s/^((\S+ +){5})(.+)$/\1${user} \3/" >>"${temp}"
done <
# Output the collected crontab lines. Replace the single spaces between the
 # fields with tab characters, sort the lines by hour and minute, insert the
 # header line, and format the results as a table.
 cat "${temp}" |
 sed --regexp-extended "s/^(\S+) +(\S+) +(\S+) +(\S+) +(\S+) +(\S+) +(.*)$/\1\t\2\t\3\t\4\t\5\t\6\t\7/" |
 sort --numeric-sort --field-separator="${tab}" --key=2,1 |
 sed "1i\mi\th\td\tm\tw\tuser\tcommand" |
 column -s"${tab}" -t
rm --force "${temp}"
source: How do I list all cron jobs for all users?

Nmap Reference Guide

08/01/2024 Comments off

NMAP: Host Discovery

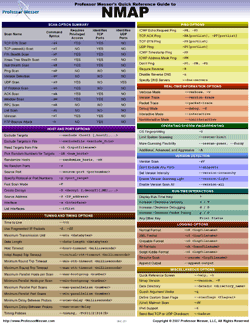
nmap reference guideNMAP: One of the very first steps in any network reconnaissance mission is to reduce a (sometimes huge) set of IP ranges into a list of active or interesting hosts. Scanning every port of every single IP address is slow and usually unnecessary.
Of course what makes a host interesting depends greatly on the scan purposes. Network administrators may only be interested in hosts running a certain service, while security auditors may care about every single device with an IP address. An administrator may be comfortable using just an ICMP ping to locate hosts on his internal network, while an external penetration test may use a diverse set of dozens of probes in an attempt to evade firewall restrictions.

Because host discovery needs are so diverse, Nmap offers a wide variety of options for customizing the techniques used. Host discovery is sometimes called ping scan, but it goes well beyond the simple ICMP echo request packets associated with the ubiquitous ping tool. Users can skip the ping step entirely with a list scan (-sL) or by disabling ping (-Pn), or committed the network with arbitrary combinations of multi-port TCP SYN/ACK, UDP, SCTP INIT and ICMP probes.

The goal of these probes is to solicit responses which demonstrate that an IP address is actually active (is being used by a host or network device). On many networks, only a small percentage of IP addresses are active at any given time. This is particularly common with private address space such as 10.0.0.0/8. That network has 16 million IPs, but I have seen it used by companies with less than a thousand machines. Host discovery can find those machines in a sparsely allocated sea of IP addresses.

If no. host discovery options are given, Nmap sends an ICMP echo request, a TCP SYN packet to port 443, a TCP ACK packet to port 80, and an ICMP timestamp request. (For IPv6, the ICMP timestamp request is omitted because it is not part of ICMPv6.) These defaults are equivalent to the – PE - PS443 - PA80 - PP options. The exceptions to this are the ARP (for IPv4) and Neighbor Discovery (for IPv6) scans which are used for any targets on a local ethernet network.

For unprivileged Unix shell users, the default probes are a SYN packet to ports 80 and 443 using the connect system call. This host is often sufficient when local scanning discovery networks, but a more comprehensive set of discovery probes is recommended for security auditing. Lire la suite…

Categories: Système Tags:

Change & Set the Default crontab Editor

08/01/2024 Comments off


Most hardcore command line users and unix geeks love vi, but I prefer nano. If you want to change your default crontab editor to nano, here’s how to do this:

For a one time edit, launch the terminal and type:

EDITOR=nano crontab -e

If you want to set nano as your default editor in general, you use this command:

export EDITOR=nano

Now when you go to edit crontab, nano will be the default editor than vi. You can test this by typing:

crontab -e

Looking beyond Mac OS X, this should work in Linux as well.

Categories: Système Tags: , , , ,

How to create a reverse SSH tunnel

07/01/2024 Comments off

Sometimes that we need to connect via SSH into another computer, we find out that this computer that we intend to SSH into (which we are going to call "destiny") may be utilizing NAT and therefore it doesn 't count with a public IP address that we could use to connect to it, or it may be behind a firewall that won' t allow access from the outside.

If "destiny" can successfully establish a SSH connection to another computer that is accessible, we can utilize this second computer to establish a reverse SSH tunnel to our "destiny" computer, we are going to call this second computer "origin" (even if it is not actually the computer that we are going to use to manage "target" remotely, but only a bridge).

A reverse SSH tunnel works by connecting "destiny" to "origin" and then utilizing this connection to SSH into "destiny" from any computer that is connected to "origin". This reverse SSH tunnel should work in most Linux systems without any problem.

So, lets assume that we have this two computers:

"Origin" IP: aaa.bbb.ccc.ddd

"Destiny" IP: unknown or unavailable

First of all, we establish the SSH connection from "destiny" to "origin", enabling the reverse SSH functionality with the parameter – a:

SSH r 61999:localhost:22 [email protected]

The first number (61999) indicates which port are we going to use in "origin" to log into "destiny", localhost is the domain name that we will be using for this as well, and the last number (22) indicates which port is "destiny" listening to for SSH.

Once this connection is live, and being logged in "origin" (it doesn't matter if we are logged in locally or remotely), we can establish the connection to "destiny":

SSH p 61999 destiny_user@localhost

Effectively, we can use a computer with permanent SSH access as a bridge between computers that are not otherwise accessible via SSH. Any computer that is connected to "origin" can log into other computers with reverse SSH tunneling enabled.


Categories: Système Tags:

Astuce pour « ssh-copy-id » sur un port ssh différent

06/01/2024 Comments off

Bon, a priori vous connaissez la commande "ssh-copy-id" pour copier sa clé publique sur un serveur distant afin de s’identifier par clé et plus par mot de passe.

Le principe est d’avoir une paire de clés privée/publique, le plus souvent dans "~/.ssh/id_rsa(.pub)" et de la copier à l’intérieur du fichier "~/.ssh/authorized_keys" sur la machine distante.

$ ssh-copy-id -i ~/.ssh/id_rsa.pub user@host

Mais si la machine distante n’accepte pas les connexions sur le port 22 ou bien qu’il y a une redirection de ports sur le routeur, il faut lui indiquer ce port, par exemple :

$ ssh-copy-id -i ~/.ssh/id_rsa.pub -p 2222 user@host

Mais ça ne marche pas car ssh-copy-id ne comprend que 2 paramètres et si on met "-p 2222" en second, ça n’est pas un motif de type "[user@]host", et si on le met après, en troisième, il est ignoré.

Et bien il suffit d’entourer les infos de connexion ssh par des guillemets pour qu’ils soient vus comme un seul paramètre :

$ ssh-copy-id -i ~/.ssh/id_rsa.pub "-p 2222 user@host"


Source: Jérémy Lecour