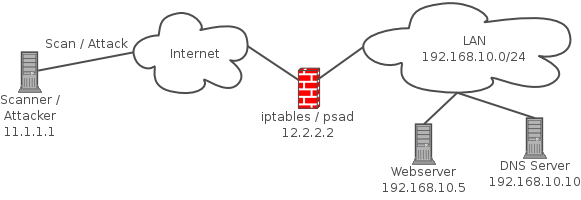
First off, if you want the real deal and get your service DDoS protected from even the most complex types of DDoS attacks by security specialists today, don’t bother reading about SYNPROXY and instead check out our Anti DDoS Hosting and Remote DDoS Protection. If you feel confident that you can use SYNPROXY as an addition to your current DDoS mitigation strategy and are an experienced system or network admin, continue reading.
It’s nothing new that DDoS attacks are increasing constantly in size and quantity over the years, making them more likely to affect you personally every month passing by. Apart of DNS Amplifictation Attacks, SYN Floods are one of the most common DDoS attack types today. Until recently Linux systems were very bad at handling SYN Floods properly compared to *BSD, which has a SYN Proxy feature built into its default firewall « PF » for quite a while now, which is a good approach for SYN Flood DDoS mitigation. The Linux default firewall « IPTables » hasn’t had a similar feature for a long time and the only approach to mitigate SYN Floods was the Kernel’s « syncookie » feature, which isn’t by far as performant as one would wish when under SYN Flood.
Finally, after years of lacking appropiate SYN Flood mitigation options under Linux, the new « SYNPROXY » target was introduced with the 3.12 kernel and IPTables version 1.4.21 trying to fill that gap quite successfully. Although it’s not a cure for every SYN Flood, because most ISPs are likely to nullroute your IP before the attack clogs your TCP/IP stack and probably your NIC will cause interrupts before your kernel, but tests have shown that there is a major increase of performance when under SYN Flood, SYN-ACK Flood or ACK Flood.
While a Linux kernel with default settings usually starts to cause software interrupts and starts dropping packets at as little as 200.000 packets per second (PPS), it can handle multiple millions of packets per second with the strategy explained in this tutorial. The number of SYN packets it can handle per second increases by a factor of 10 and the number of ACK packets it can handle per second even increases by a factor of 20, which can be a major advantage when you have to handle large amounts of packets (read: you’re under SYN or ACK Flood).
IPTables « SYNPROXY » on Debian Wheezy In this example we’ll use a Debian Wheezy system for our setup. I can imagine this being used on Vyatta boxes in the future to effectively protect whole network segments with very cheap hardware. The first things we’ll have to do is to upgrade our kernel and iptables version.
After a few days of being attacked by a 25,000 zombie botnet, believe me i have tried almost everything possible to make it stop. The best thing that helped was this script, thought it could help here when it’s your turn getting those script-kiddies attackers visiting your servers.
#!/bin/sh
#------------------------------------------------------------------------------
#
# File: SIG-antiDDoS.sh
#
# Compiler: Ruslan Abuzant <[email protected]>
#           PS> Collected From Lots Of Sources
#           PS> Credits: Real Authors (no idea)
#
# URL: http://www.liteforex.org/
#
# License: GNU GPL (version 2, or any later version).
#
# Configuration.
#------------------------------------------------------------------------------

# For debugging use iptables -v.
IPTABLES="/sbin/iptables"
IP6TABLES="/sbin/ip6tables"
MODPROBE="/sbin/modprobe"
RMMOD="/sbin/rmmod"
ARP="/usr/sbin/arp"


# Logging options.
#------------------------------------------------------------------------------
LOG="LOG --log-level debug --log-tcp-sequence --log-tcp-options"
LOG="$LOG --log-ip-options"


# Defaults for rate limiting
#------------------------------------------------------------------------------
RLIMIT="-m limit --limit 3/s --limit-burst 8"
Nodaways seems that every script kid is able to produce a soft DDOS attack, happily they are small and limited so they cant saturate your DNS unless they really know what they are doing.
This is a more or less step by step guide intended for begginers to help stabilize the linux server and prevent further attacks.
There are some basic settings you should have already implemented in your linux server as part of security 101 but this is not always the case and also it is not enough.
Questions and Answers:
Limiting the ammount of concurrent connections from the same IP address to your Server.
Identifying the offending IP.
And kill the Ongoing TCP Connections with TCPKILL.
Or use Cutter to kill the connections on any port/Network interface.
Drop it With Iptables.
Make the DROP Persistant after a reboot. (iptables save and restore)
Basic Iptables-save trouble shoot.
Stop Start Iptables
This article assumes you have root access to your linux BOX / Server, the IP addresses shown in this guide are randomly generated and in no case are offending connections.
I am using GUI tool to setup firewall rules for my home computer connected to ADSL (DSL/Cable) network. However, after reboot my rules are not saved. Is there any way I can save and load all firewall rules again?
You need to use the iptables-save command, which is used to dump the contents of an IP Table in easily parseable format to screen. Using I/O-redirection provided by your shell you can save iptables firewall rules to a file.
To restore iptables rules use the iptables-restore command. It is used to restore an IP Tables from data specified from file. Use I/O redirection provided by your shell to read from a file.
Examples: Saving and Restoring Iptables Rules
In this example, save current iptables firewall rules to a file called /root/dsl.fw, enter: # iptables-save > /root/dsl.fw
To restore iptables rules, enter: # iptables-restore < /root/dsl.fw
To restore rules automatically upon Linux system reboot add following command to your /etc/rc.local file, enter: # vi /etc/rc.local
Append the line: /sbin/iptables-restore < /root/dsl.fw
Save and close the file. Please note that under Red Hat enterprise Linux (RHEL) / CentOS / Fedora Linux you can use following commands to save and restore firewall rules. To Save the rules to /etc/sysconfig/iptables file: # /etc/init.d/iptables save
To restore the rules from /etc/sysconfig/iptables file: # /etc/init.d/iptables start
If you are using Debian / Ubuntu Linux open /etc/network/interfaces: # vi /etc/network/interfaces
Append the line to eth0 section: post-up iptables-restore Close and save the file. Reboot the system.
psad is a collection of three lightweight system daemons (two main daemons and one helper daemon) that run on Linux machines and analyze iptables log messages to detect port scans and other suspicious traffic. A typical deployment is to run psad on the iptables firewall where it has the fastest access to log data.
psad incorporates many signatures from the Snort intrusion detection system to detect probes for various backdoor programs (e.g. EvilFTP, GirlFriend, SubSeven), DDoS tools (mstream, shaft), and advanced port scans (FIN, NULL, XMAS) which are easily leveraged against a machine via nmap. When combined with fwsnort and the Netfilter string match extension, psad is capable of detecting many attacks described in the Snort rule set that involve application layer data. In addition, psad makes use of various packet header fields associated with TCP SYN packets to passively fingerprint remote operating systems (in a manner similar to p0f) from which scans originate. Further, psad can be integrated with Logstash, and also offers support for UFW firewalls[1]. For more information, see the complete list of features offered by psad.
First off, if you want the real deal and get your service DDoS protected from even the most complex types of DDoS attacks by security specialists today, don’t bother reading about SYNPROXY and instead check out our Anti DDoS Hosting and Remote DDoS Protection. If you feel confident that you can use SYNPROXY as an addition to your current DDoS mitigation strategy and are an experienced system or network admin, continue reading.

 Nodaways seems that every script kid is able to produce a soft DDOS attack, happily they are small and limited so they cant saturate your DNS unless they really know what they are doing.