Archive

Articles taggués ‘administration’

Munin: Monitoring the “unreachable” hosts

14/04/2024 Comments off

Source: munin-monitoring.org
There are a number of situations where you’d like to run munin-node on hosts not directly available to the Munin server. This article describes a few scenarios and different alternatives to set up monitoring. Monitoring hosts behind a non-routing server.

In this scenario, a *nix server sits between the Munin server and one or more Munin nodes. The server in-between reaches both the Munin server and the Munin node, but the Munin server does not reach the Munin node or vice versa.

To enable for Munin monitoring, there are several approaches, but mainly either using SSH tunneling or “bouncing” via the in-between server.

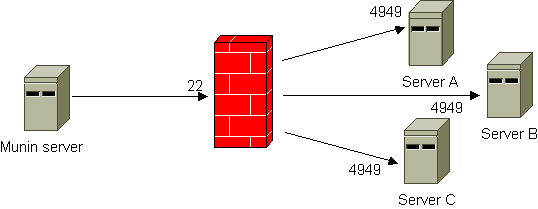
SSH tunneling

The illustration below shows the principle. By using SSH tunneling only one SSH connection is required, even if you need to reach several hosts on “the other side”. The Munin server listens to different ports on the localhost interface. A configuration example is included. Note that there is also a FAQ entry on using SSH that contains very useful information.
MuninSSHForwarding

Bouncing

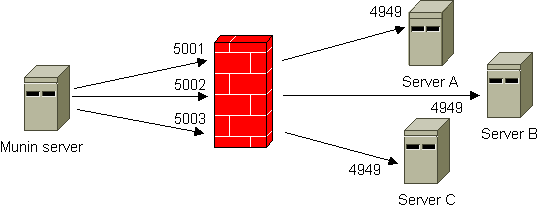
This workaround uses netcat and inetd/xinetd to forward the queries from the Munin server. All incoming connections to defined ports are automatically forwarded to the Munin node using netcat.
MuninPortForwarding


Monitoring Your Network And Servers With Observium

31/03/2024 Comments off

Source: unixmen.com

Introduction

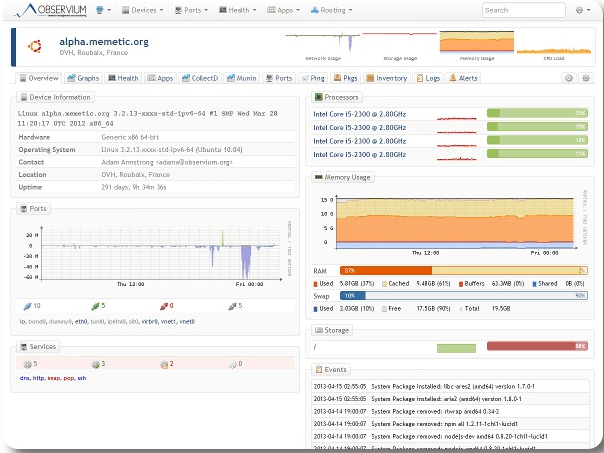
You have a problem while monitoring your servers, switches or physical machines. Observium fits your need. As a free monitoring system, it helps you to monitor your servers remotely. It is an auto-discovering SNMP based network monitoring platform written in PHP which includes support for a wide range of network hardware and operating systems including Cisco, Windows, Linux, HP, NetApp and many other. I will give you the steps to follow while setting up an Observium server on Ubuntu 12.04.

Capture1

Currently there are two different versions of observium.
  • The observium Community is a free tool and licensed under the QPL Open Source license. This version is the best solution for small deployments. It gets security updates each 6 months.
  • While the second version, the Observium Professional is distributed under SVN based release mechanism. And it gets daily security updates. This tool is the best for Service Provider and enterprises deployments.

For more information you can visit the offcial website of Observium.

Lire la suite…

Réalisez un audit sécurité de votre système GNU/Linux facilement

19/03/2024 Comments off

audit securiteDéveloppé par la même personne derrière le scanner de malware Rkhunter, Lynis est un outil qui va vous permettre de réaliser un audit simple de votre machine sous GNU/Linux.

Pour installer Lynis (sous Ubuntu) :

sudo apt-get install lynis

Pour lancer le scan :

sudo lynis -clynis1


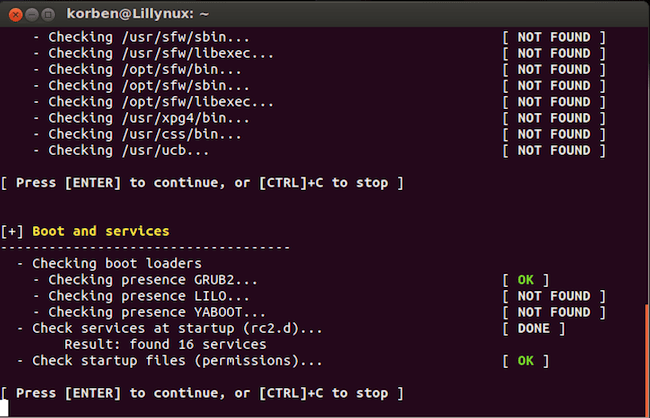
Ensuite, l’analyse se fera sur les utilitaires systèmes, le bootloader et les services, le kernel, la mémoire et les processus, tout ce qui est utilisateurs, groupes et authentification, les shells, le système de fichiers, le stockage, NFS, DNS, les ports et les packages, la config réseau, les imprimantes, les logiciels de messagerie, le firewall, le serveur web, la config SSH, SNMP, les bases de données, LDAP, PHP, Squid, les logs, les services non sécurisés, la crontab, les comptes, l’heure et la synchronisation temporelle, le chiffrement, la virtualisation, les frameworks de sécurité présents, les softs de vérification d’intégrité des fichiers, les scanners de malware, les utilitaires systèmes, les répertoires home…etc.

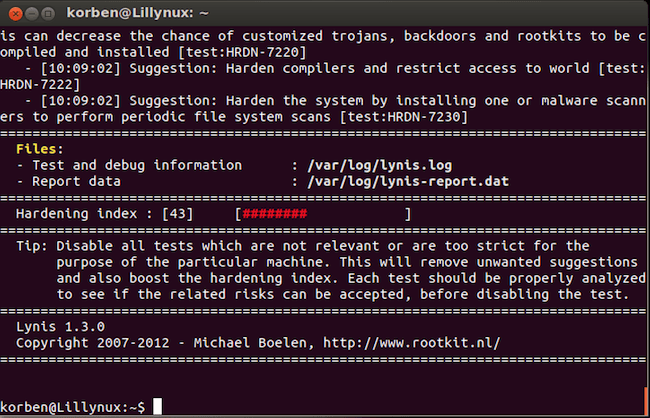
Le scan se termine ensuite par une liste de suggestions plus ou moins longue de petites choses à améliorer pour rendre votre système plus sécurisé.lynis21


Pour info, le rapport complet, une fois achevé se trouve ici : /var/log/lynis.log

Par exemple, pour visualiser uniquement les choses qui urgent (Warning), il suffit de faire un petit grep :

sudo grep Warning /var/log/lynis.log

Et pour consulter uniquement les bons conseils de Lynis :

sudo grep Suggestion /var/log/lynis.log

De quoi, déjà, faire un bon petit tour d’horizon sur les faiblesses de votre système et ne rien laisser grand ouvert qu’un méchant hacker pourrait exploiter.

Source: korben.info

Configuration d’un serveur dédié de A à Z

17/03/2024 Comments off

Installation, configuration et administration d’un serveur dédié

debianCes tutoriaux ont été réalisés sous Debian (versions Etch 4.0 et Lenny 5.0) mais peuvent être transposés à d’autres distributions Linux, notamment Ubuntu. Ils sont applicables aux serveurs dédiés 1&1, Dedibox, OVH, Amen, et bien d’autres.

warning Tous les tutoriaux sont basés sur un serveur nommé test.alsacreations.com pour lequel nous disposons d’un utilisateur dew et d’un accès root (super-administrateur), chacun avec leur propre mot de passe.

Nous partons de l’idée d’obtenir un serveur web avec tout ce qu’il faut pour héberger plusieurs domaines et sites. Vous pouvez tout configurer à la main ou bien faire confiance à un panel d’administration.

Liste complète sans panel web

idee Ces tutoriaux conviennent à l’installation complète d’un serveur

  1. Première connexion : SSH, accès root et bases
  2. Apache et PHP : le serveur web
  3. MySQL : les bases de données
  4. Proftpd : le serveur FTP
  5. Postfix : le serveur mail POP3 et SMTP
  6. Sauvegarde automatique : avec backup-manager et export FTP
  7. Sécurisation : les règles de base, un firewall avec iptables, fail2ban…
  8. Bind : exécuter le serveur DNS en chroot
  9. Monitoring : garder un oeil sur son serveur grâce à monit et logwatch
  10. Roundcube : un webmail léger et rapide

Liste complète avec panel d’administration DTC

dtclogo

idee Si vous choisissez d’installer le panel d’administration DTC, suivez ces tutoriels. DTC se chargera de la configuration du reste des services.

  1. Première connexion : SSH, accès root et bases
  2. Bind : exécuter le serveur DNS en chroot
  3. Sécurisation : les règles de base, un firewall avec iptables, fail2ban…
  4. Panel DTC : pour installer et gérer les services web, ftp, mysql, e-mail, dns…
  5. Monitoring : garder un oeil sur son serveur grâce à monit et logwatch
  6. Sauvegarde automatique : backup-manager et export FTP
  7. Roundcube : un webmail léger et rapide

Attention : nous préconisons désormais l’utilisation du panel ISPConfig, en lieu et place du panel DTC. Il est tout aussi simple à installer et à utiliser. Veuillez vous référer à sa documentation.

Clone Your Ubuntu installation

09/03/2024 Comments off

If you want to create a system that is similar to a different system you have already set up, it can be difficult to remember each and every package you had installed.This method works best when you are exporting to and importing from the same distribution and, specifically, the same releasefor example, exporting from Ubuntu Dapper to Ubuntu Dapper or ubuntu edgy to ubuntu edgy.

Ubuntu uses the APT package management system which handles installed packages and their dependencies. If we can get a list of currently installed packages you can very easily duplicate exactly what you have installed now on your new machine. Below is a command you can use to export a list of your installed packages.

sudo dpkg --get-selections | grep '[[:space:]]install$='| awk '{print $1}' > installedpackages
Now you should end up with a file called “installedpackages” which consists of a long list of every package your currently have installed.

The next step would be to tell the clone machine to install each of those packages. You’ll have to copy that file to the clone machine (via network, usb drive, email, etc) and also make sure to duplicate the /etc/apt/sources.list file. Without the same access to repositories it may not be able to find the packages.

To tell your system to use the previously exported package list use the following command (after making sure to also clone your /etc/apt/sources.list file).

Update the source list using the following command

sudo aptitude update

Import the package list using the following command

cat installedpackages | xargs sudo aptitude install