tmux & screen cheat-sheet

02/06/2024 Categories: Logiciel, Système Tags: , , , Comments off

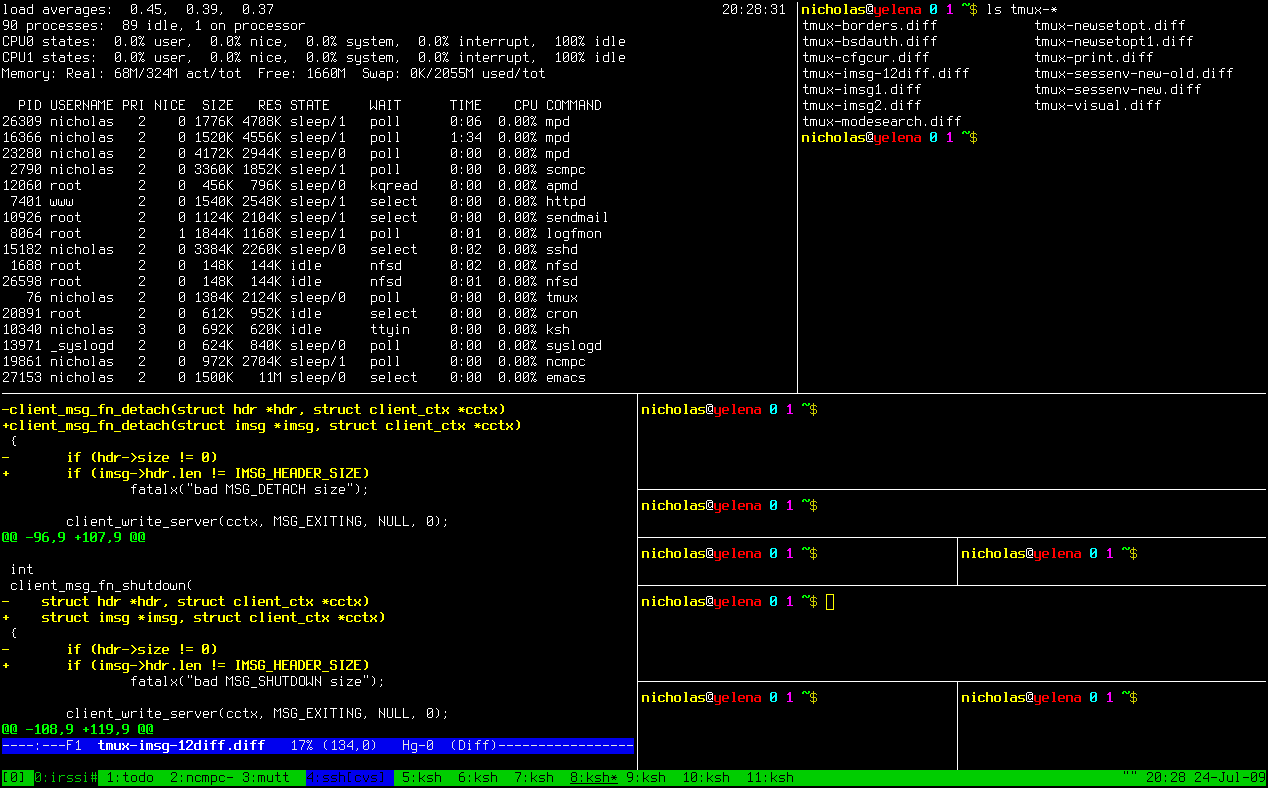
screen and tmux

A comparison of the features (or more-so just a table of notes for accessing some of those features) for GNU screen and BSD-licensed tmux.

The formatting here is simple enough to understand (I would hope). ^ means ctrl+, so ^x is ctrl+x. M- means meta (generally left-alt or escape)+, so M-x is left-alt+x

It should be noted that this is no where near a full feature-set of either group. This – being a cheat-sheet – is just to point out the most very basic features to get you on the road.

Trust the developers and manpage writers more than me. This document is originally from 2009 when tmux was still new – since then both of these programs have had many updates and features added (not all of which have been dutifully noted here).

Actiontmuxscreen
start a new sessiontmux OR
tmux new OR
tmux new-session
screen
re-attach a detached sessiontmux attach OR
tmux attach-session
screen -r
re-attach an attached session (detaching it from elsewhere)tmux attach -d OR
tmux attach-session -d
screen -dr
re-attach an attached session (keeping it attached elsewhere)tmux attach OR
tmux attach-session
screen -x
detach from currently attached session^b d OR
^b :detach
^a ^d OR
^a :detach
rename-window to newname^b , <newname> OR
^b :rename-window <newn>
^a A <newname>
list windows^b w^a w
list windows in chooseable menu ^a « 
go to window #^b #^a #
go to last-active window^b l^a ^a
go to next window^b n^a n
go to previous window^b p^a p
see keybindings^b ?^a ?
list sessions^b s OR
tmux ls OR
tmux list-sessions
screen -ls
toggle visual bell ^a ^g
create another window^b c^a c
exit current shell/window^d^d
split window/pane horizontally^b « ^a S
split window/pane vertically^b %^a |
switch to other pane^b o^a <tab>
kill the current pane^b x OR (logout/^D) 
collapse the current pane/split (but leave processes running) ^a X
close other panes except the current one^b ! 
cycle location of panes^b ^o 
swap current pane with previous^b { 
swap current pane with next^b } 
show time^b t 
show numeric values of panes^b q 
toggle zoom-state of current pane (maximize/return current pane^b z 
break the current pane out of its window (to form new window)^b ! 

Source: dayid.org

Tmux (terminal multiplexer)

02/06/2024 Categories: Logiciel, Système Tags: , , , Comments off

TmuxTmux, à l’instar de Screen, est un multiplexeur de terminaux, outil permettant d’exploiter plusieurs terminaux au sein d’un seul et même affichage.

Installation

Tmux n’est pas installé par défaut. Pour l’installer à l’aide d’un utilitaire graphique il suffit d’Installer le paquets tmux.
Par l’installer avec apt-get depuis un terminal, il suffit de saisir la commande suivante :

sudo apt-get install tmux

Utilisation de tmux

Depuis le tableau de bord (dash), un terminal ou encore une console saisissez la commande suivante :

tmux

Les principaux raccourcis

Tmux fait appel à l’ensemble de touches <Ctrl> <b> là ou screen fait appel à <Ctrl> <a>.

Les raccourcis et fonctions étant proches voire identiques à ceux de Screen, pour mieux les comprendre, reportez-vous à la page Screen.
 

Raccourcis de base

  • <Ctrl> <b> suivi de <c> : Créer un nouveau terminal dans la session tmux active
  • <Ctrl> <b> suivi de <n> : Switcher entre les différents terminaux de la session
  • <Ctrl> <b> suivi de <X> : Choisir un terminal spécifique (ou X est le numéro du terminal)
  • <Ctrl> <b> suivi de <d> : Se détacher de la session tmux (lancer ‘tmux a’ pour s’y rattacher)
  • <Ctrl> <b> suivi de <,> : Permet de renommer un terminal
  • <Ctrl> <b> suivi de <w> : Affiche la liste des terminaux disponibles
  • <Ctrl> <b> suivi de <t> : Afficher l’heure dans un terminal

Commandes dans un Split

  • <Ctrl> <b> suivi de <« > : Split vertical du terminal courant en deux ouverture d’un terminal dans le nouveau panel
  • <Ctrl> <b> suivi de <%> : Split horizontal du terminal courant en deux ouverture d’un terminal dans le nouveau panel
  • <Ctrl> <b> suivi de <o> : Switcher entre les terminaux splittés
  • <Ctrl> <b> suivi de <espace> : Changer l’organisation visuelle des terminaux splittés
  • <Ctrl> <b> suivi de <Alt> (flèches directionnelles) : Reduire, agrandir fenêtre du split
  • <Ctrl> <b> suivi de <!> : Convertir un split en terminal seul
  • <Ctrl> <b> suivi de <q> : Afficher les numéros des terminaux splittés
  • <Ctrl> <b> puis saisissez :join : permet de joindre un terminal seul dans un split

Par exemple, après avoir tapé le combo <Ctrl> <b> si vous saisissez

:join -v -s 3.0 -p 50

Où :

  • -h ou -v : pour horizontalement ou verticalement
  • -s 3.0 : terminal 3 et volet 0 (volet si écran splitté)
  • -p 50 : occupation à 50% de la fenêtre

Ici donc vous ajouterez verticalement, un terminal numéroté 3 et qui prendra 50% de l’espace total.

Lire la suite…

Iptables Firewall

01/06/2024 Categories: Réseau, Sécurité Tags: , , Comments off

Source: tty1.netthere

This page presents a simple firewall script. It is probably not the best of all possible firewalls, nor the most secure, but may be a starting point for your experiments. Please send any comments and suggestions to <[email protected]>.

Update 2011-05-28: IPv6 script

Please see the page for a newer firewall script with IPv6 support.

Turning on native Kernel IPv4 protection

The Linux kernel provides some basic protections against manipulated IP packets. A configuration could be:

echo 1 > /proc/sys/net/ipv4/tcp_syncookies                          # enable syn cookies (prevent against the common 'syn flood attack')
echo 0 > /proc/sys/net/ipv4/ip_forward                              # disable Packet forwarning between interfaces
echo 1 > /proc/sys/net/ipv4/icmp_echo_ignore_broadcasts             # ignore all ICMP ECHO and TIMESTAMP requests sent to it via broadcast/multicast
echo 1 > /proc/sys/net/ipv4/conf/all/log_martians                   # log packets with impossible addresses to kernel log
echo 1 > /proc/sys/net/ipv4/icmp_ignore_bogus_error_responses       # disable logging of bogus responses to broadcast frames
echo 1 > /proc/sys/net/ipv4/conf/all/rp_filter                      # do source validation by reversed path (Recommended option for single homed hosts)
echo 0 > /proc/sys/net/ipv4/conf/all/send_redirects                 # don't send redirects
echo 0 > /proc/sys/net/ipv4/conf/all/accept_source_route            # don't accept packets with SRR option

Further reading:

  • The file Documentation/networking/ip-sysctl.txt in your kernel source directory
  • Network Security with /proc/sys/net/ipv4

Limit ping responses

Any iptables rule can be tuned to respond only to a limited number of times per time unit by using the limit module. This can be extremely useful for log entries (A ping flooding will not lock down your computer by writing to log files). I will show an example on how to limit on ICMP responses. This is not really useful, because it imposes a maximum number of responses for ALL source IP addresses, but it may help to reduce network traffic on brute force attacks (and reduce volume in the log file).

iptables -A INPUT  -p icmp -m limit --limit 10/second -j ACCEPT
iptables -A INPUT  -p icmp -j DROP

This will limit the ICMP responses to a maximum of 10 replies per second. All the rest is silently dropped. Beware: dropping ICMP responses may slow down or cut off legitimate users (for example when ICMP « Fragmentation Needed » packets are dropped).

Dealing with brute force ssh attacks

A stateful firewall can make brute force ssh scans more painful to the attacker by slowing down the responses. I will present a simple teergrubing strategy against ssh scans. This method relies on the IPTables/Netfilter Recent Module, written by Snow-man. The idea is simple: permit only a limited number of new connections per source IP address; drop any further connection attempt for a while.

iptables -A INPUT -p tcp --dport 22 -m recent --rcheck --seconds 60 --hitcount 2 --name SSH -j LOG --log-prefix "SH "
iptables -A INPUT -p tcp --dport 22 -m recent --update --seconds 60 --hitcount 2 --name SSH -j DROP
iptables -A INPUT -p tcp --dport 22 -m state --state NEW -m recent --set --name SSH -j ACCEPT
iptables -A INPUT  -i $int_if -m state --state ESTABLISHED,RELATED -j ACCEPT

Line 1 of the script checks if the source IP has already marked as ‘Bad Guy’ and logs the packet, if so. The second line drops the packet if it comes from a marked IP address and marks the source again. This ensures that the source will stay blacklisted as long as the attack continues. The third line marks the source IP as ‘Bad Guy’ if there are more than 2 connection attempts per minute. Note that already established connections continue to work (because the packets will no more arriving on 22).

Further reading:

Lire la suite…

Detect and Block WordPress Brute Force Login Attacks

01/06/2024 Categories: Logiciel, Réseau, Sécurité Tags: , , , , , Comments off

detect and block wordpress brute forceIf you run a wordpress blog these days, you are likely to experience brute force attacks where nefarious individuals attempt to break in to your website by quickly a list of userids and passwords against your wp-login.php.  Here’s how I automated detection and blocking of WordPress brute force login attacks.

Detecting a WordPress Brute Force Attack

One can typically detect a wordpress brute force attack by parsing through your webserver’s access_log file.  The access_log file records all of the access requests that a web server handles.  A brute force attack typically will have frequent and numerous attempts to the wp-login.php file as shown below:

Example:  In the access_log file below, we detect a brute force login attack on our WordPress blog.  We detected it by noticing frequent and constant requests to the wp-login.php file.

31.192.210.159 - - [11/Sep/2014:02:01:43 +0000] "POST http://www.uptimemadeeasy.com/wp-login.php HTTP/1.1" 200 3389 "http://www.uptimemadeeasy.com/wp-login.php" "Mozilla/5.0 (Linux; U; Android 2.2) AppleWebKit/533.1 (KHTML, like Gecko) Version/4.0 Mobile Safari/533.1"
31.192.210.159 - - [11/Sep/2014:02:01:44 +0000] "POST http://www.uptimemadeeasy.com/wp-login.php HTTP/1.1" 200 3389 "http://www.uptimemadeeasy.com/wp-login.php" "Mozilla/5.0 (Linux; U; Android 2.2) AppleWebKit/533.1 (KHTML, like Gecko) Version/4.0 Mobile Safari/533.1"
31.192.210.159 - - [11/Sep/2014:02:01:45 +0000] "POST http://www.uptimemadeeasy.com/wp-login.php HTTP/1.1" 200 3389 "http://www.uptimemadeeasy.com/wp-login.php" "Mozilla/5.0 (Linux; U; Android 2.2) AppleWebKit/533.1 (KHTML, like Gecko) Version/4.0 Mobile Safari/533.1"
31.192.210.159 - - [11/Sep/2014:02:01:47 +0000] "POST http://www.uptimemadeeasy.com/wp-login.php HTTP/1.1" 200 3389 "http://www.uptimemadeeasy.com/wp-login.php" "Mozilla/5.0 (Linux; U; Android 2.2) AppleWebKit/533.1 (KHTML, like Gecko) Version/4.0 Mobile Safari/533.1"
31.192.210.159 - - [11/Sep/2014:02:01:49 +0000] "POST http://www.uptimemadeeasy.com/wp-login.php HTTP/1.1" 200 3389 "http://www.uptimemadeeasy.com/wp-login.php" "Mozilla/5.0 (Linux; U; Android 2.2) AppleWebKit/533.1 (KHTML, like Gecko) Version/4.0 Mobile Safari/533.1"
31.192.210.159 - - [11/Sep/2014:02:01:50 +0000] "POST http://www.uptimemadeeasy.com/wp-login.php HTTP/1.1" 200 3389 "http://www.uptimemadeeasy.com/wp-login.php" "Mozilla/5.0 (Linux; U; Android 2.2) AppleWebKit/533.1 (KHTML, like Gecko) Version/4.0 Mobile Safari/533.1"
31.192.210.159 - - [11/Sep/2014:02:01:51 +0000] "POST http://www.uptimemadeeasy.com/wp-login.php HTTP/1.1" 200 3389 "http://www.uptimemadeeasy.com/wp-login.php" "Mozilla/5.0 (Linux; U; Android 2.2) AppleWebKit/533.1 (KHTML, like Gecko) Version/4.0 Mobile Safari/533.1"
31.192.210.159 - - [11/Sep/2014:02:01:52 +0000] "POST http://www.uptimemadeeasy.com/wp-login.php HTTP/1.1" 200 3389 "http://www.uptimemadeeasy.com/wp-login.php" "Mozilla/5.0 (Linux; U; Android 2.2) AppleWebKit/533.1 (KHTML, like Gecko) Version/4.0 Mobile Safari/533.1"
31.192.210.159 - - [11/Sep/2014:02:01:54 +0000] "POST http://www.uptimemadeeasy.com/wp-login.php HTTP/1.1" 200 3389 "http://www.uptimemadeeasy.com/wp-login.php" "Mozilla/5.0 (Linux; U; Android 2.2) AppleWebKit/533.1 (KHTML, like Gecko) Version/4.0 Mobile Safari/533.1"
31.192.210.159 - - [11/Sep/2014:02:01:55 +0000] "POST http://www.uptimemadeeasy.com/wp-login.php HTTP/1.1" 200 3389 "http://www.uptimemadeeasy.com/wp-login.php" "Mozilla/5.0 (Linux; U; Android 2.2) AppleWebKit/533.1 (KHTML, like Gecko) Version/4.0 Mobile Safari/533.1"

Typically in an event like this, I lookup the IP address in the ARIN database as I showed in a previous article:  What Personal Information Can You Get From Your Web Server?  Frequently, I find that the address is from APAC or RIPE addresses.

Lire la suite…

How to protect from port scanning and smurf attack in Linux Server by iptables

31/05/2024 Categories: Réseau, Sécurité Tags: , Comments off

Source: sharadchhetri.com

In this post I will share the iptable script in which we will learn How to protect from port scanning and smurf attack in Linux Server.

Features Of Script :

  1. When a attacker try to port scan your server, first because of iptable attacker will not get any information which port is open. Second the Attacking IP address will be blacklisted for 24 Hour (You can change it in script) . Third , after that attacker will not able to open access anything for eg. even attacker will not see any website running on server via web browser, not able to ssh,telnet also. Means completely restricted.
  2. Protects from smurf attack
  3. Written with the help of IPTABLE hence no System Performance issue like CPU high,Memory usage etc. No third party tool is used
    Note: You can add or remove port no. as per your requirement.

Description about Server where we will implement IPTABLES script:

Operating System : CentOS 6.4 (applicable to Red hat and CentOS servers)
IP Address: 192.168.1.4

Now we will create the script

Step 1: Create a bash script with the name of iptablescript.sh

vi /root/iptablescript.sh

Step 2: Now paste the below given script contents in your bash script file iptablescript.sh

#!/bin/sh
#
#
# Script is for stoping Portscan and smurf attack

### first flush all the iptables Rules
iptables -F


# INPUT iptables Rules
# Accept loopback input
iptables -A INPUT -i lo -p all -j ACCEPT

# allow 3 way handshake
iptables -A INPUT -m state --state ESTABLISHED,RELATED -j ACCEPT

### DROPspoofing packets
iptables -A INPUT -s 10.0.0.0/8 -j DROP 
iptables -A INPUT -s 169.254.0.0/16 -j DROP
iptables -A INPUT -s 172.16.0.0/12 -j DROP
iptables -A INPUT -s 127.0.0.0/8 -j DROP
iptables -A INPUT -s 192.168.0.0/24 -j DROP

iptables -A INPUT -s 224.0.0.0/4 -j DROP
iptables -A INPUT -d 224.0.0.0/4 -j DROP
iptables -A INPUT -s 240.0.0.0/5 -j DROP
iptables -A INPUT -d 240.0.0.0/5 -j DROP
iptables -A INPUT -s 0.0.0.0/8 -j DROP
iptables -A INPUT -d 0.0.0.0/8 -j DROP
iptables -A INPUT -d 239.255.255.0/24 -j DROP
iptables -A INPUT -d 255.255.255.255 -j DROP

#for SMURF attack protection
iptables -A INPUT -p icmp -m icmp --icmp-type address-mask-request -j DROP
iptables -A INPUT -p icmp -m icmp --icmp-type timestamp-request -j DROP
iptables -A INPUT -p icmp -m icmp -m limit --limit 1/second -j ACCEPT

# Droping all invalid packets
iptables -A INPUT -m state --state INVALID -j DROP
iptables -A FORWARD -m state --state INVALID -j DROP
iptables -A OUTPUT -m state --state INVALID -j DROP

# flooding of RST packets, smurf attack Rejection
iptables -A INPUT -p tcp -m tcp --tcp-flags RST RST -m limit --limit 2/second --limit-burst 2 -j ACCEPT

# Protecting portscans
# Attacking IP will be locked for 24 hours (3600 x 24 = 86400 Seconds)
iptables -A INPUT -m recent --name portscan --rcheck --seconds 86400 -j DROP
iptables -A FORWARD -m recent --name portscan --rcheck --seconds 86400 -j DROP

# Remove attacking IP after 24 hours
iptables -A INPUT -m recent --name portscan --remove
iptables -A FORWARD -m recent --name portscan --remove

# These rules add scanners to the portscan list, and log the attempt.
iptables -A INPUT -p tcp -m tcp --dport 139 -m recent --name portscan --set -j LOG --log-prefix "portscan:"
iptables -A INPUT -p tcp -m tcp --dport 139 -m recent --name portscan --set -j DROP

iptables -A FORWARD -p tcp -m tcp --dport 139 -m recent --name portscan --set -j LOG --log-prefix "portscan:"
iptables -A FORWARD -p tcp -m tcp --dport 139 -m recent --name portscan --set -j DROP

# Allow the following ports through from outside
iptables -A INPUT -p tcp -m tcp --dport 25 -j ACCEPT
iptables -A INPUT -p tcp -m tcp --dport 80 -j ACCEPT
iptables -A INPUT -p tcp -m tcp --dport 443 -j ACCEPT
iptables -A INPUT -p tcp -m tcp --dport 22 -j ACCEPT

# Allow ping means ICMP port is open (If you do not want ping replace ACCEPT with REJECT)
iptables -A INPUT -p icmp -m icmp --icmp-type 8 -j ACCEPT

# Lastly reject All INPUT traffic
iptables -A INPUT -j REJECT


################# Below are for OUTPUT iptables rules #############################################

## Allow loopback OUTPUT 
iptables -A OUTPUT -o lo -j ACCEPT
iptables -A OUTPUT -m state --state ESTABLISHED,RELATED -j ACCEPT

# Allow the following ports through from outside 
# SMTP = 25
# DNS =53
# HTTP = 80
# HTTPS = 443
# SSH = 22
### You can also add or remove port no. as per your requirement

iptables -A OUTPUT -p tcp -m tcp --dport 25 -j ACCEPT
iptables -A OUTPUT -p udp -m udp --dport 53 -j ACCEPT
iptables -A OUTPUT -p tcp -m tcp --dport 80 -j ACCEPT
iptables -A OUTPUT -p tcp -m tcp --dport 443 -j ACCEPT
iptables -A OUTPUT -p tcp -m tcp --dport 22 -j ACCEPT

# Allow pings
iptables -A OUTPUT -p icmp -m icmp --icmp-type 8 -j ACCEPT

# Lastly Reject all Output traffic
iptables -A OUTPUT -j REJECT

## Reject Forwarding  traffic
iptables -A FORWARD -j REJECT

Step 3: Make the Read Write Execute permission only to root user. (For security)

 chmod 700 /root/iptablescript.sh
  chown root:root /root/iptablescript.sh

Step 4 : Now run the script

sh /root/iptablescript.sh 

or 

/root/iptablescript.sh

Step 6: Now check the IPTABLES rule with following command

iptables -nL

Now we will do testing from remote server to our server where we have implemented the iptable

Step 7: login into any system and try to do port scanning

nmap -sT Server-ip-address

eg.

nmap -sT 192.168.1.4

Step 8: The result should be now from your system like following types

(a) Not getting any output from nmap
(b) Not able to do telnet to any port for eg. telnet Server-ip-address 22

After running nmap means port scan your ip-address is blacklisted.

You can find your system ip address in message logs in Server with the keyword called portscan.
So login back to your server and check the messages log in /var/log

Note : how to install nmap

In Red Hat and CentOS

yum install nmap

In Debian and Ubuntu

apt-get install nmap
Categories: Réseau, Sécurité Tags: ,