Archive

Archives pour 10/2026

Ten MySQL performance tuning settings after installation

16/10/2026 Comments off

mysql performance tuningIn this blog we’re going to discuss the top ten MySQL performance tuning settings that you can implement after an installation.

When we are hired for a MySQL performance audit, we are expected to review the MySQL configuration and to suggest improvements. Many people are surprised because in most cases, we only suggest changing a few MySQL performance tuning settings after installation – even though hundreds of options are available. The goal of this post is to give you a list of some of the most critical settings.

We already made such suggestions in the past here on this blog a few years ago, but things have changed a lot in the MySQL world since then!

Before we start…

Even experienced people can make mistakes that can cause a lot of trouble. So before blindly applying the recommendations of this post, please keep in mind the following items:

  • Change one setting at a time! This is the only way to estimate if a change is beneficial.
  • Most settings can be changed at runtime with SET GLOBAL. It is very handy and it allows you to quickly revert the change if it creates any problem. But in the end, you want the setting to be adjusted permanently in the configuration file.
  • A change in the configuration is not visible even after a MySQL restart? Did you use the correct configuration file? Did you put the setting in the right section? (all settings in this post belong to the [mysqld] section)
  • The server refuses to start after a change: did you use the correct unit? For instance, innodb_buffer_pool_size should be set in bytes while max_connection is dimensionless.
  • Do not allow duplicate settings in the configuration file. If you want to keep track of the changes, use version control.
  • Don’t do naive math, like “my new server has 2x RAM, I’ll just make all the values 2x the previous ones”.

Basic settings fro MySQL performance

Here are 3 MySQL performance tuning settings that you should always look at. If you do not, you are very likely to run into problems very quickly.

innodb_buffer_pool_size: this is the #1 setting to look at for any installation using InnoDB. The buffer pool is where data and indexes are cached: having it as large as possible will ensure you use memory and not disks for most read operations. Typical values are 5-6GB (8GB RAM), 20-25GB (32GB RAM), 100-120GB (128GB RAM).

innodb_log_file_size: this is the size of the redo logs. The redo logs are used to make sure writes are fast and durable and also during crash recovery. Up to MySQL 5.1, it was hard to adjust, as you wanted both large redo logs for good performance and small redo logs for fast crash recovery. Fortunately crash recovery performance has improved a lot since MySQL 5.5 so you can now have good write performance and fast crash recovery. Until MySQL 5.5 the total redo log size was limited to 4GB (the default is to have 2 log files). This has been lifted in MySQL 5.6.

Starting with innodb_log_file_size = 512M (giving 1GB of redo logs) should give you plenty of room for writes. If you know your application is write-intensive and you are using MySQL 5.6, you can start with innodb_log_file_size = 4G.

max_connections: if you are often facing the ‘Too many connections’ error, max_connections is too low. It is very frequent that because the application does not close connections to the database correctly, you need much more than the default 151 connections. The main drawback of high values for max_connections (like 1000 or more) is that the server will become unresponsive if for any reason it has to run 1000 or more active transactions. Using a connection pool at the application level or a thread pool at the MySQL level can help here.

Lire la suite…

How to Optimize MySQL Tables and Defragment to Recover Space

15/10/2026 Comments off

MySQL OPTIMIZE TABLE command

If your application is performing lot of deletes and updates on MySQL database, then there is a high possibility that your MySQL data files are fragmented.

This will result in lot of unused space, and also might affect performance.

So, it is highly recommended that you defrag your MySQL tables on an ongoing basis.

This tutorial explains how to optimize MySQL to defrag tables and reclaim unused space.

1. Identify Tables for Optimization

The first step is to identify whether you have fragmentation on your MySQL database.

Connect to your MySQL database, and execute the following query, which will display how much unused space are available in every table.

mysql> use thegeekstuff;

mysql> select table_name,
round(data_length/1024/1024) as data_length_mb, 
round(data_free/1024/1024) as data_free_mb 
 from information_schema.tables 
 where round(data_free/1024/1024) > 500 
 order by data_free_mb;

+------------+----------------+--------------+
| table_name | data_length_mb | data_free_mb |
+------------+----------------+--------------+
| BENEFITS   |           7743 |         4775 |
| DEPARTMENT |          14295 |        13315 |
| EMPLOYEE   |          21633 |        19834 |
+------------+----------------+--------------+

In the above output:

  • This will display list of all tables that has minimum of 500MB of unused space. As we see above, in this example, there are 3 tables that has more than 500MB of unused space.
  • data_length_mb column displays the total table size in MB. For example, EMPLOYEE table size is around 21GB.
  • data_free_mb column displays the total unused space in that particular table. For example, EMPLOYEE table has around 19GB of unused space in it.
  • All these three tables (EMPLOYEE, DEPARTMENT AND BENEFITS) are heavily fragmented and it needs to be optimized to reclaim the unused space.

From the filesystem level, you can see the size of the individual table files as shown below.

The file size will be the same as what you see under “data_length_mb” column in the above output.

# ls -lh /var/lib/mysql/thegeekstuff/
..
-rw-rw----. 1 mysql mysql  7.6G Apr 23 10:55 BENEFITS.MYD
-rw-rw----. 1 mysql mysql   14G Apr 23 12:53 DEPARTMENT.MYD
-rw-rw----. 1 mysql mysql   22G Apr 23 12:03 EMPLOYEE.MYD
..

In this example, the EMPLOYEE.MYD file is taking up around 22GB at the filesystem level, but it has lot of unused space in it. If we optimize this table, the size of this file should go down dramatically.

Lire la suite…

SIP Server IPTABLES Sample firewall Rules !

15/10/2026 Comments off

SIP Server protection

IPtables rules

iptables -I INPUT -p udp -m udp –dport 5060 -m string –string "REGISTER sip:" –algo bm -m recent –set –name VOIP –rsource
iptables -I INPUT -p udp -m udp –dport 5060 -m string –string "REGISTER sip:" –algo bm -m recent –update –seconds 60 –hitcount 12 –rttl –name VOIP –rsource -j DROP
iptables -I INPUT -p udp -m udp –dport 5060 -m string –string "INVITE sip:" –algo bm -m recent –set –name VOIPINV –rsource
iptables -I INPUT -p udp -m udp –dport 5060 -m string –string "INVITE sip:" –algo bm -m recent –update –seconds 60 –hitcount 12 –rttl –name VOIPINV –rsource -j DROP
iptables -I INPUT -p udp -m hashlimit –hashlimit 6/sec –hashlimit-mode srcip,dstport –hashlimit-name tunnel_limit -m udp –dport 5060 -j ACCEPT
iptables -I INPUT -p udp -m udp –dport 5060 -j DROP

# RTP – the media stream
# (related to the port range in /etc/asterisk/rtp.conf)
iptables -A INPUT -p udp -m udp –dport 10000:20000 -j ACCEPT

# MGCP – if you use media gateway control protocol in your configuration
iptables -A INPUT -p udp -m udp –dport 2727 -j ACCEPT

Sample script

#!/bin/bash
EXIF="eth0"
# Clear any existing firewall stuff before we start
/sbin/iptables –flush
# As the default policies, drop all incoming traffic but allow all
# outgoing traffic. This will allow us to make outgoing connections
# from any port, but will only allow incoming connections on the ports
# specified below.
# Allow connections from my machines
/sbin/iptables -A INPUT -p tcp -i $EXIF -m state –state NEW -s 109.161.251.214 -j ACCEPT
/sbin/iptables –policy INPUT DROP
/sbin/iptables –policy OUTPUT ACCEPT
# Allow all incoming traffic if it is coming from the local loopback device
/sbin/iptables -A INPUT -i lo -j ACCEPT
# Accept all incoming traffic associated with an established connection, or a "related" connection
/sbin/iptables -A INPUT -i $EXIF -m state –state ESTABLISHED,RELATED -j ACCEPT
# Check new packets are SYN packets for syn-flood protection
/sbin/iptables -A INPUT -p tcp ! –syn -m state –state NEW -j DROP
# Drop fragmented packets
/sbin/iptables -A INPUT -f -j DROP
# Drop malformed XMAS packets
/sbin/iptables -A INPUT -p tcp –tcp-flags ALL ALL -j DROP
# Drop null packets
/sbin/iptables -A INPUT -p tcp –tcp-flags ALL NONE -j DROP
# Allow connections to port (4501) – ssh. You can add other ports you need in here
/sbin/iptables -A INPUT -p tcp -i $EXIF –dport 4501 -m state –state NEW -j ACCEPT
# Allow connections to port (4500) – Webmin . You can add other ports you need in here
/sbin/iptables -A INPUT -p tcp -i $EXIF –dport 4500 -m state –state NEW -j ACCEPT
# Allow connections to port (80&443) – www. You can add other ports you need in here
/sbin/iptables -A INPUT -p tcp -i $EXIF –dport 80 -m state –state NEW -j ACCEPT
/sbin/iptables -A INPUT -p tcp -i $EXIF –dport 443 -m state –state NEW -j ACCEPT
# Allow connections from my machines
/sbin/iptables -A INPUT -p tcp -i $EXIF -m state –state NEW -s 80.241.212.93 -j ACCEPT
# Allow SIP connections
/sbin/iptables -A INPUT -p udp -i $EXIF –dport 5060 -m udp -j ACCEPT
/sbin/iptables -A INPUT -p tcp -i $EXIF –dport 5060 -m tcp -j ACCEPT
/sbin/iptables -A INPUT -p udp -i $EXIF –dport 10000:20000 -m udp -j ACCEPT
# Allow icmp input so that people can ping us
/sbin/iptables -A INPUT -p icmp –icmp-type 8 -m state –state NEW -j ACCEPT
# Log then drop any packets that are not allowed. You will probably want to turn off the logging
#/sbin/iptables -A INPUT -j LOG
/sbin/iptables -A INPUT -j REJECT

Source: Ahmad Sabry ElGendi

http://sysadminman.net/blog/2008/iptables-for-asterisk-49

http://www.voip-info.org/wiki/view/Asterisk+firewall+rules

Categories: Réseau, Sécurité Tags: ,

13 Apache Web Server Security and Hardening Tips

14/10/2026 Comments off

Apache-Security-Tips1We all are very familiar with Apache web server, it is a very popular web server to host your web files or your website on the web. Here are some links which can help you to configure Apache web server on your Linux box.

Here in this tutorial, I’ll cover some main tips to secure your web server. Before you apply these changes in your web server, you should have some basics of the Apache server.

  • Document root Directory: /var/www/html or /var/www
  • Main Configuration file: /etc/httpd/conf/httpd.conf (RHEL/CentOS/Fedora) and /etc/apache/apache2.conf(Debian/Ubuntu).
  • Default HTTP Port: 80 TCP
  • Default HTTPS Port: 443 TCP
  • Test your Configuration file settings and syntax: httpd -t
  • Access Log files of Web Server: /var/log/httpd/access_log
  • Error Log files of Web Server: /var/log/httpd/error_log

1. How to hide Apache Version and OS Identity from Errors

When you install Apache with source or any other package installers like yum, it displays the version of your Apache web server installed on your server with the Operating system name of your server in Errors. It also shows the information about Apache modules installed in your server.

Show-Apache-Version

Show-Apache-Version

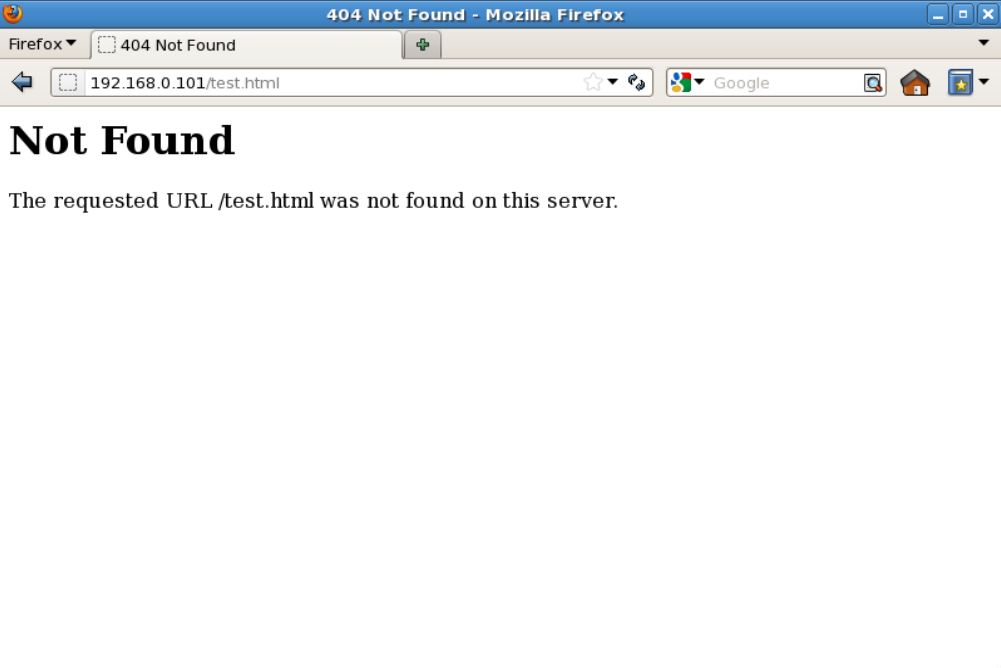
In above picture, you can see that Apache is showing its version with the OS installed in your server. This can be a major security threat to your web server as well as your Linux box too. To prevent Apache to not to display these information to the world, we need to make some changes in Apache main configuration file.

Open configuration file with vim editor and search for “ServerSignature“, its by default On. We need to Off these server signature and the second line “ServerTokens Prod” tells Apache to return only Apache as product in the server response header on the every page request, It suppress the OS, major and minor version info.

# vim /etc/httpd/conf/httpd.conf (RHEL/CentOS/Fedora)
# vim /etc/apache/apache2.conf (Debian/Ubuntu)
ServerSignature Off
ServerTokens Prod
# service httpd restart (RHEL/CentOS/Fedora)
# service apache2 restart (Debian/Ubuntu)
 

Hide-Apache-Version

2. Disable Directory Listing

By default Apache list all the content of Document root directory in the absence of index file. Please see the image below.

Apache-Directory-Listing

Apache-Directory-Listing

We can turn off directory listing by using Options directive in configuration file for a specific directory. For that we need to make an entry in httpd.conf or apache2.conf file.
<Directory /var/www/html>
    Options -Indexes
</Directory>
Hide-Apache-Directory-Listing

Hide-Apache-Directory-Listing

Lire la suite…

Categories: Logiciel, Sécurité Tags: , ,

How to turn off server signature on Apache2 web server

14/10/2026 Comments off

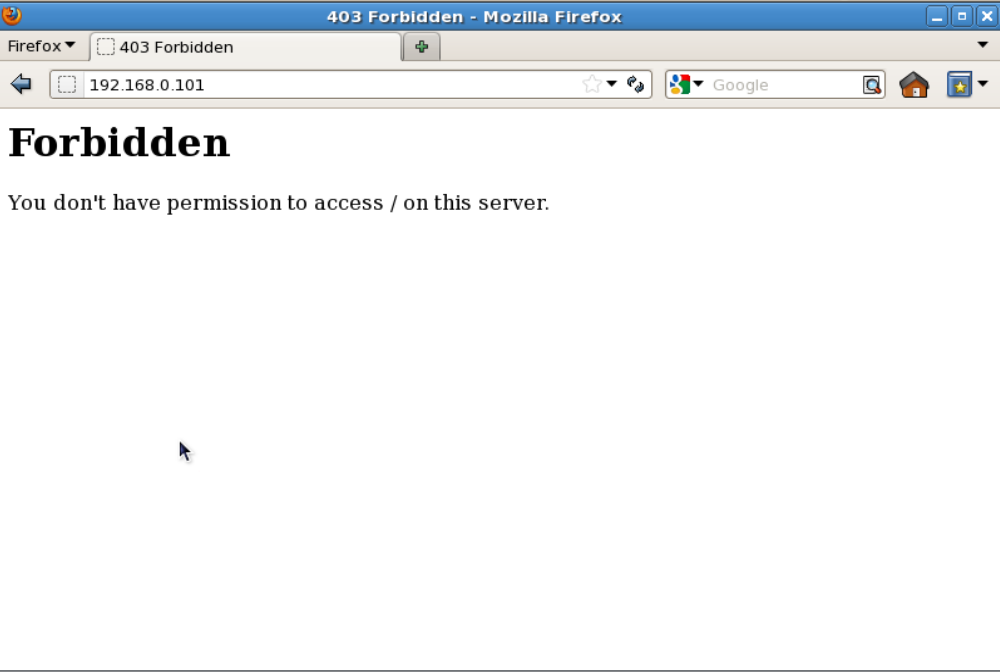
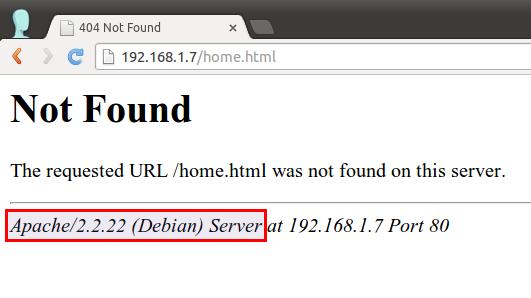
Question: Whenever Apache2 web server returns error pages (e.g., 404 not found, 403 access forbidden pages), it shows web server signature (e.g., Apache version number and operating system info) at the bottom of the pages. Also, when Apache2 web server serves any PHP pages, it reveals PHP version info. How can I turn off these web server signatures in Apache2 web server?

Revealing web server signature with server/PHP version info can be a security risk as you are essentially telling attackers known vulnerabilities of your system. Thus it is recommended you disable all web server signatures as part of server hardening process.

14902970545_c3d406322f_o14879982016_7c7b8bbf3d_o

Disable Apache Web Server Signature

Disabling Apache web server signature can be achieved by editing Apache config file.

On Debian, Ubuntu or Linux Mint:

$ sudo vi /etc/apache2/apache2.conf

On CentOS, Fedora, RHEL or Arch Linux:

$ sudo vi /etc/httpd/conf/httpd.conf

Add the following two lines at the end of Apache config file.

ServerSignature Off
ServerTokens Prod

Then restart web server to activate the change:

$ sudo service apache2 restart (Debian, Ubuntu or Linux Mint)
$ sudo service httpd restart (CentOS/RHEL 6)
$ sudo systemctl restart httpd.service (Fedora, CentOS/RHEL 7, Arch Linux)

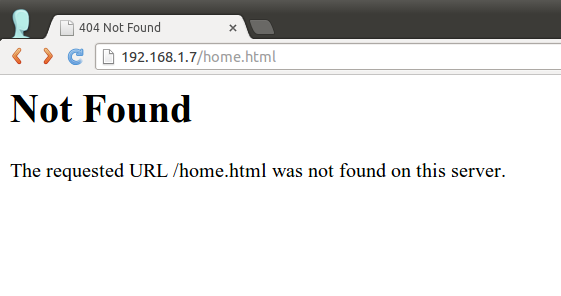
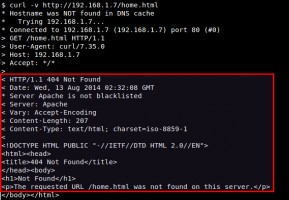
The first line ‘ServerSignature Off‘ makes Apache2 web server hide Apache version info on any error pages.

14879982016_7c7b8bbf3d_o

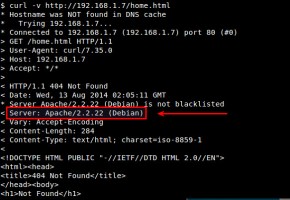
However, without the second line ‘ServerTokens Prod‘, Apache server will still include a detailed server token in HTTP response headers, which reveals Apache version number.

14902970535_e84ec23090_z

What the second line ‘ServerTokens Prod‘ does is to suppress a server token in HTTP response headers to a bare minimal.

So with both lines in place, Apache will not reveal Apache version info in either web pages or HTTP response headers.

14902970505_d79225f25d_z

Hide PHP Version

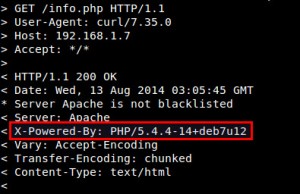
Another potential security threat is PHP version info leak in HTTP response headers. By default, Apache web server includes PHP version info via « X-Powered-By » field in HTTP response headers. If you want to hide PHP version in HTTP headers, open php.ini file with a text editor, look for « expose_php = On », and change it to « expose_php = Off ».

14899917981_aaef71eb0a

On Debian, Ubuntu, or Linux Mint:

$ sudo vi /etc/php5/apache2/php.ini

On CentOS, Fedora, RHEL or Arch Linux:

$ sudo vi /etc/php.ini

expose_php = Off

Finally, restart Apache2 web server to reload updated PHP config file.

Now you will no longer see « X-Powered-By » field in HTTP response headers.

Source: Xmodulo

Categories: Logiciel, Sécurité Tags: , ,