Archive

Articles taggués ‘Mac OS X’

How to mount ext2/ext3 Linux Volumes in Mac OS X (Snow Leopard) with Read/Write access

16/02/2024 Comments off

Source: The WireFrame

I was actually surprised to find out that there is no native support for popular ext2/ext3 Linux Volumes in mac OS X. So if you are like me and have ext2/ext3 drives lying around and want to access them using OS X then here is a compact guide to sort things out in Snow Leopard.

1. Install MacFUSE

If you haven’t already installed it download and install MacFUSE from http://code.google.com/p/macfuse/downloads/list.

2. Install FUSE – Ext2

Once you have MacFUSE download and install fuse-ext2 from http://sourceforge.net/projects/fuse-ext2/. Even though it says fuse-ext2, this one package gives both ext2 and ext3 read-write support.

After installation you should see both MacFUSE and fuse-ext2 icons in System Preferences.
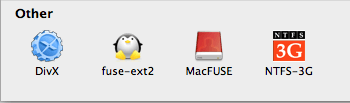
 

fuse_ext2

That’s it. You now have support for ext2 and ext3 file systems. When you plug in an external ext2/ext3 partition it should automatically show up in Finder, mounted and ready to use. You can also use the following commands if you prefer the shell.

$ fuse-ext2 <device|image> <mountpoint> [-o option[,...]]
$ mount -t fuse-ext2 <device|image> <mountpoint>


Note: If auto-mount is not giving you read/write access to ext2/ext3 partitions then you will have to edit the auto-mount script for fuse-ext2 which can be found at /System/Library/Filesystems/fuse-ext2.fs/fuse-ext2.util.

$ sudo nano -c /System/Library/Filesystems/fuse-ext2.fs/fuse-ext2.util

Around line 207 (in function Mount ()) you will find the line OPTIONS="auto_xattr,defer_permissions". Change that line to read asOPTIONS="auto_xattr,defer_permissions,rw+".

...
function Mount ()
{
LogDebug "[Mount] Entering function Mount..."
# Setting both defer_auth and defer_permissions. The option was renamed
# starting with MacFUSE 1.0.0, and there seems to be no backward
# compatibility on the options.
# OPTIONS="auto_xattr,defer_permissions"
OPTIONS="auto_xattr,defer_permissions,rw+"
# The local option is only enabled on Leopard. It causes strange

…

Categories: Système Tags:

Get Lynx for Mac OS X 10.7 Lion

14/02/2024 Comments off

Source: OSXdaily

lynx-from-macports

Lynx is a text based command line web browser, it’s relatively popular within unix communities but it also has a variety of general uses too; it’s great if you want to discretely browse the web and read articles at work or school, and developers use lynx frequently to test accessibility and to roughly estimate how spiders or crawlers view a website. Because it only loads text and avoids javascript and images, it’s also lightning fast.

Anyway, after updating to Lion I discovered my previous installation of lynx was not functioning. Thankfully it’s very easy to install a working version with the help of MacPorts.

Installing and Running Lynx in Mac OS X 10.7 Lion

For the purpose of this walkthrough, we’re going to keep requirements to a minimum and install lynx through MacPorts, here’s what you’ll need:

Assuming you have now installed Xcode 4.1 and MacPorts 2.0, here’s how to install lynx:

sudo port install lynx

MacPorts will then fetch all the required dependencies including ncurses and zlib, and then proceed to install the lynx browser.

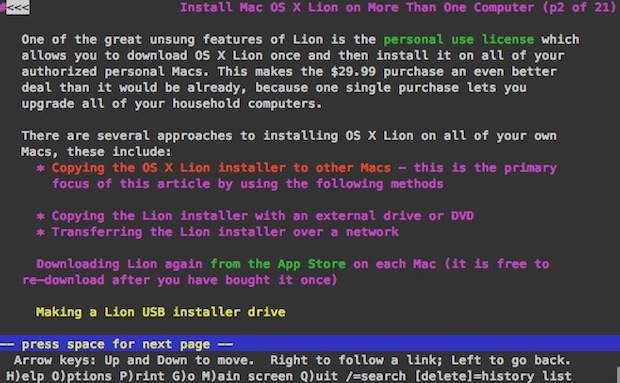
Once it’s finished, just type ‘lynx’ at the command line and it’ll launch as expected. You can then hit “G” to go to a URL, or open one directly from the command line.

This opens OSXDaily.com, for example:

lynx osxdaily.com

You then just use the arrow keys and return/enter to navigate around a site.

Lynx is great, enjoy!

Categories: Logiciel Tags: , ,

Add a Recent Items Menu to the Dock

13/02/2024 Comments off

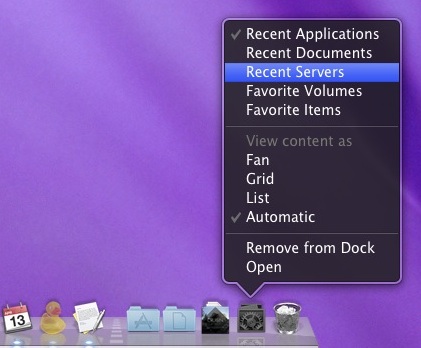
You can add a Recent Items menu to the Mac OS X Dock by using a defaults write command. The default is set to “Recent Applications” but once the Dock item exists you can adjust it to feature other recent items too.

Launch the terminal and enter the following:

defaults write com.apple.dock persistent-others -array-add '{ "tile-data" = { "list-type" = 1; }; "tile-type" = "recents-tile"; }'

That needs to all be on a single line, so if you copy and paste it make sure the command is one string.

You will then need to kill the Dock:

killall Dock

Now right-click on the newly appeared Recent Applications Dock item and you can change it to be Recent Applications, Recent Documents, Recent Servers, Favorite Volumes, or Favorite Items.

recent-items-dock-mac

If you want to remove the Recent Items menu, just drag it out of your Dock.

Categories: Logiciel Tags: , ,

MailRecent (Mail Plugin for Mac OS X)

09/02/2024 Comments off

Source: Gregory F. Welch

Adds « Copy to Recent, » « Move to Recent, » and « Go to Recent » menu items to Apple’s Mail application. These menu items contain dynamically-updated lists of recently used mailboxes. The number of mailboxes kept in the list is determined by the « Number of Recent Items » setting for Documents in the Appearance panel of the OS X System Preferences.

screenshot


Usage

Once installed (see instructions below) as you drag or option-drag a message to a mailbox, that mailbox should then appear under

  • « Copy to Recent » and « Move to Recent » submenus under the « Messages » menu, and
  • a « Go to Recent » submenu under the « Mailboxes » menu.

Similarly if you use Mail’s built-in « Move To » or « Copy To » menus to move a message to a mailbox, that mailbox should then appear in the lists. The recent mailboxes will be sorted alphabetically, the same as OS X does for recent documents. (You can change the sorting behavior using the Terminal application as described below.)

Lire la suite…

Categories: Logiciel Tags: , ,

Un serveur web intégré à OSX

09/02/2024 Comments off

Si vous êtes sous Mac OSX et que vous avez besoin d’un petit serveur HTTP sur le pouce afin de mettre à dispo quelques pages web statiques (pas de PHP, uniquement du HTML), il n’est pas nécessaire d’installer un Nginx ou un Apache.
Il suffit d’ouvrir un terminal et d’entrer la commande suivante :

python -m SimpleHTTPServer 8000

Ensuite, avec votre navigateur sur la machine distante, rendez-vous sur http://IP_DE_LA_MACHINE:8000 (ou localhost:8000 si vous êtes en local) et naviguez dans les répertoires jusqu’à atteindre le fichier HTML que vous souhaitez afficher. A noter que vous pouvez changer le port dans la commande.

Rien de sécurisé là-dedans, donc faites attention, mais l’astuce est toujours bonne à connaitre.

Source

Categories: Logiciel Tags: , , ,